iV2 Video Capture Interface
The iV2 iCon module connects to high-resolution USB3 cameras to record video frames synchronized with all behavioral, electrophysiology, fiber photometry, and other research data. Record video from up to two cameras simultaneously per iV2 module.
- Records video from up to two USB cameras
- Synchronizes video frames with all other recorded behavioral and neurophysiological data.
- Displays selected camera output on unit for easy camera setup and subject monitoring.
Frame data is sent through the iCon interface back to the PC, shown on the Synapse window, and saved with the rest of your data as an MP4 file. You can review the video files along with your data in OpenScope.
See the Hardware Manual for information on iV2 technical specifications.
Getting Started
| iV2 Interface |
Start by clicking the "Cam1" button to enable the first camera (and "Cam2" if you have a second camera) and Commit.
Reference Video
The first thing to do is create a reference video. This gives you a frame in Synapse to set up desired resolution and area of interest for recording. It also retrieves the camera properties which includes the available resolutions.
-
Click "Preview" in Synapse.
-
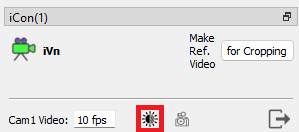
Position the camera to capture the area of interest. Use the front panel of the iV2 or the iCon tab in Synapse run-time window to see the camera image.
-
On the iCon tab in Synapse run-time window, click the small camera icon to open the camera hardware settings to adjust brightness, contrast, etc.
-
Click the "Make Reference Video" button.

-
Wait ~10 seconds and verify that the image is updating and you see Cam epocs. There will be a gap in the epoc events as it switches to Reference Mode, as shown in the example below:

-
Click the Synapse "Idle" button to return to the iV2 configuration. Synapse saved a short video at 5 fps containing the full sensor image, and retrieved the available camera resolution settings.
Note
The reference videos save to
C:\TDT\Synapse\CamRefs -
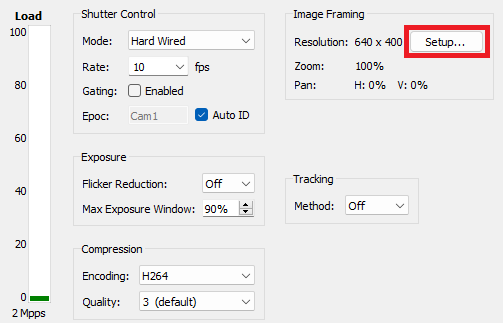
In Idle mode, click the "Setup" button.
-
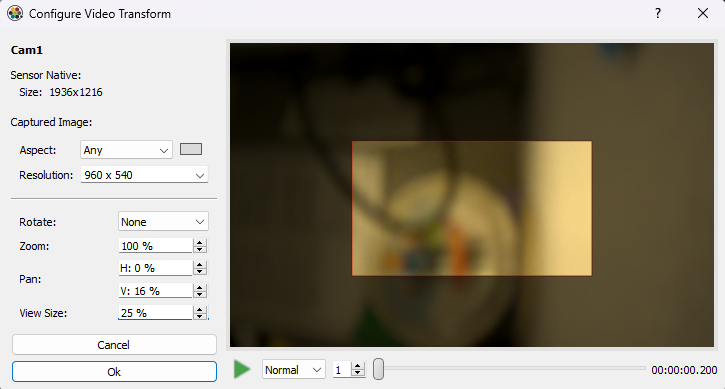
This opens the "Configure Video Transform" dialog. This is where you set the desired camera resolution, and set digital zoom / cropping on the image.
-
Once it is configured, click "OK" to exit the dialog, and click "Commit" in Synapse to save your experiment changes.
-
If you have a second camera, repeat Steps 6-8 for "Cam2".
iV2 Options
Framing Control
Gating allows you to turn frame capture on / off dynamically, if you only want to capture frames around particular events. See Capture Control below.
Exposure
Compression
Load Management
At Idle time, the Load meter dynamically updates the processing load on the iV2. This calculation is based on the number of cameras, the requested frame rate and resolution, and the encoding for each camera. This gives you an idea of the load on the system. Always double-check for lost frames in the Synapse iV2 tab at run-time.
Image dynamics and how well it can compress the images. A rapidly changing image will consume more iV2 processing power and be lower quality to meet the compression bandwidth setting limits. The iV2 has an onboard 10 second frame buffer that allows it to catch up after periods of rapidly changing images. A small progress bar indicator on the LCD screen shows the state of this buffer. If it fills up, you will see Frame Errors in the Synapse run-time tab, indicating lost frames. The frame buffer is shared by both cameras.
Capture Control
The Capture Control options appear when Gating is enabled.
| iV2 Gating Options |
Triggered Capture Interval enables frame capture for a specified amount of time when triggered. This can be triggered manually through a button on the run-time iCon tab interface, from another gizmo (Hal Input Port), or through the SynapseAPI.
Synapse API Control
If using Triggered Capture Interval, you just need to trigger frame acquisition with one call:
syn.setParameterValue('iCon(1)', 'V1_OutEnab_1', 1)
Otherwise you can toggle capture on/off with this:
syn.setParameterValue('iCon(1)', 'V1_OutEnab_1', 1)
time.sleep(1)
syn.setParameterValue('iCon(1)', 'V1_OutEnab_1', 0)
If Gating is disabled, or if Gating is enabled and Hal Input Port is True, you can use FrameEnab
to selectively override frame capture:
syn.setParameterValue('iCon(1)','V1_FrameEnab',1)
time.sleep(1)
syn.setParameterValue('iCon(1)','V1_FrameEnab',0)