Code Editor and Parser
The built-in Python editor is where all your states and events are defined, telling the Pynapse event loop what do when events happen. Click the 'Edit' button, or double-click on the Source code, to enable editing.
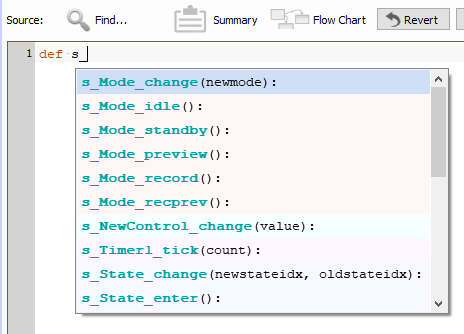
The built-in Python editor does code completion for you. Every time you press 'Commit' the parser dynamically generates
a list of methods and event triggers you have access to based on the named inputs, outputs, controls, globals,
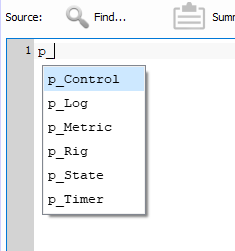
and timers. All Pynapse assets start with p_ and all slot methods start with def s_, so start there and
the code completion will show you the available assets or slots.
You can also right-click → "Help" on anything in the editor to show more complete documentation on the object under the cursor.

Asset names are linked to their method calls in the Python code. Assets that appear in the Python code will have a lock icon next to their names in their asset tab. If you decide to change the name of an asset after writing Python code that interacts with it, click the lock icon to change the name of the asset and update all of the instances of this name in the Python code.
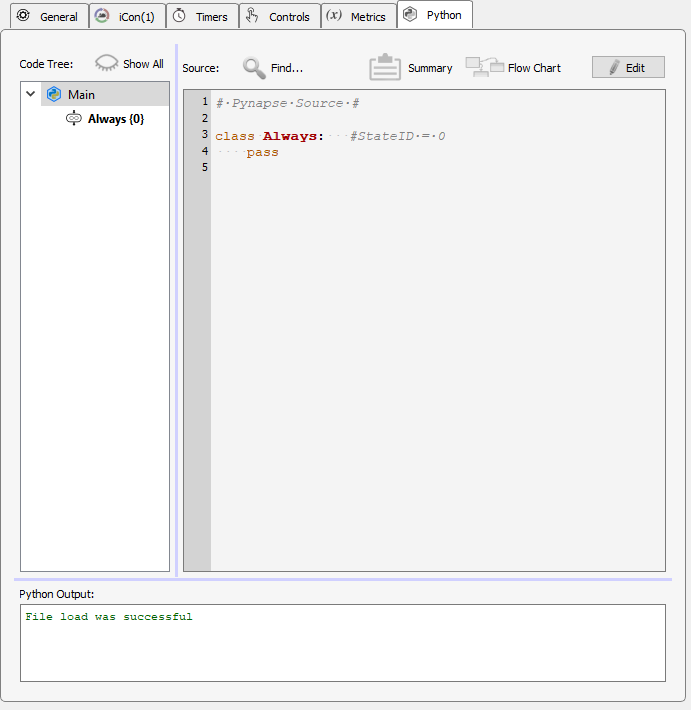
Code Tree
The parser identifies all of the states and all of the methods that are written within the states that respond to events, and builds the Code Tree.
You can click on any item in the Code Tree and the Editor shows you just the selected state or methods so you are just editing that part of the code. If you want to look at the entire file, click 'Main' in the Code Tree.
Note

By default the Code Tree shows only Pynapse states and slot methods. Sometimes you'll write methods inside states that aren't Pynapse slots. The 'Show All' button will include these methods in the Code Tree.
To Add a State
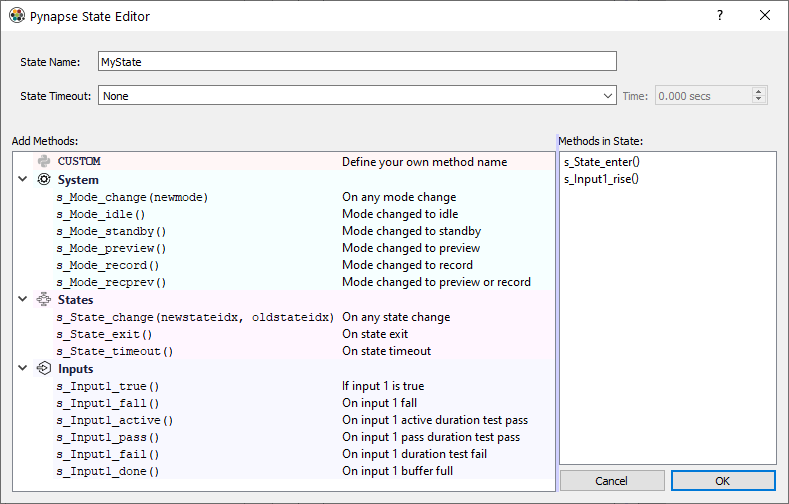
The easiest way to add a state is by right-clicking on an existing state in the Code Tree (or 'Main') and adding a state from the menu. This brings up a state creation wizard that shows you all the available hardware events you can capture with the state. You choose which methods to include in the code and a state timeout if desired. This saves you from having to remember the exact syntax for creating a state every time.
You can also edit the Python code directly with the required state structure:
class MyNewState:  #StateID = ?
    pass
Note
After you create a state, you can get back to the creation wizard by right-clicking the state name in the Code Tree → Reconfigure.
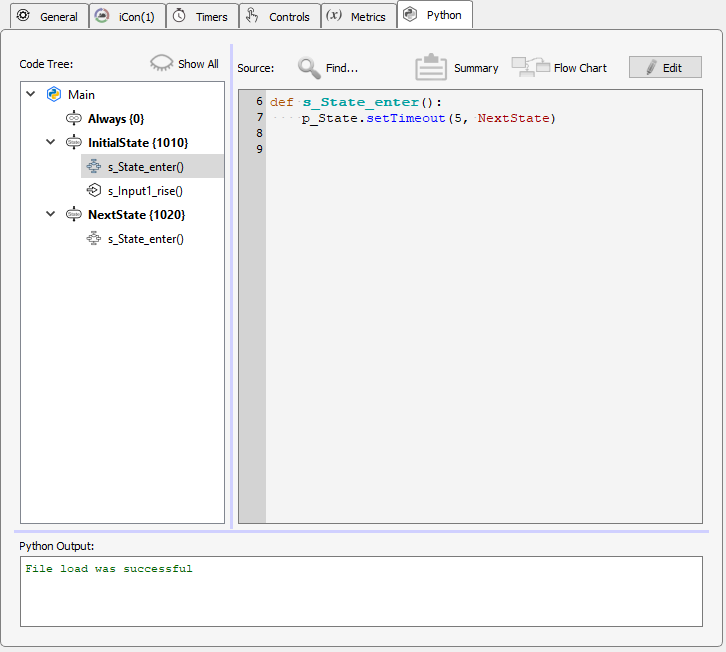
Working with StateIDs
Classes defined with the #StateID = ? comment are parsed as Pynapse states. If the StateID is ?
then Pynapse will automatically assign a number to the state for you. The StateIDs are shown next to
the state name in the Code Tree.
Note
You can include regular classes in the code that aren't Pynapse states by excluding the #StateID comment
from the class definition.
The StateID number is saved into the data tank when state changes occur during runtime. It is important that the
StateIDs are consistent across recordings. If you make changes to your Pynapse source code and all of the StateIDs
are ? then these numbers will change if you add or remove states from your source code. This will make it harder to
organize your data during post-processing if you are trying to compare data made with your newer experiment
to recordings made with earlier versions of your experiment.
The solution is to lock the StateIDs to a value right in the comment, like #StateID = 555. If you already
have code written with automatically generated StateIDs, you can lock the current StateIDs in place by right-clicking
on 'Main' and select 'Commit State IDs'. This will overwrite all of the #StateID = ? comments with their assigned
StateID, like #StateID = 1010.
Important
StateIDs have to be defined in order (top to bottom) in the Python source code. For example,
this code is invalid because the state class defined with #StateID = 2 is before #StateID = 1.
class Always: #StateID = 0
    def s_Mode_standby():
        p_State.switch(MyState1)

class MyState1: #StateID = 2
    def s_State_enter():
        print('MyState1')
        p_State.setTimeout(1, MyState2)

class MyState2: #StateID = 1
    def s_State_enter():
        print('MyState2')
        p_State.setTimeout(1, MyState1)
Flow Chart
As experiments get more complicated, it is helpful to see an overview of how the states, inputs, and outputs are connected. Click the Flow Chart button to see a graphical representation of all these links. Double-click on a state in the Flow Chart to show it in the code editor. Right-click the Flow Chart button to center the dialog on screen.
Summary

Click the Summary button to see a table view of all the Pynapse assets and their parameters - Inputs, Outputs, Metrics, Controls, etc. This is helpful to troubleshoot at a glance, and to help while coding your experiment. You don't have to keep flipping back and forth between tabs to get asset names. Right-click the Summary button to center the dialog on screen.
Organizing Your Code
Python code is stored either directly in the experiment or locally on your hard drive.
Python Code Blocks
'Main' is the default block of Pynapse code in the Code Tree saved with the experiment. You can have up to three other 'Local' Pynapse code blocks that are also saved in the experiment. These are not files on disk but rather saved with the experiment in the Synapse database. To add a code block, right-click on empty space in the Code Tree and select 'Add Local Pynapse Block'. You can import/export blocks if desired.
Python Local Files
You can import locally saved Python files from your hard drive into Pynapse. This is a convenient way to share common code between experiments. This also gives you a way to develop your own own classes/modules outside of Synapse and link to them from the experiment
You can link to as many existing files on disk as you want and they get imported automatically. To import a Python file, right-click on empty space in the Code Tree select 'Add Python Import File', and choose the Python file.
TDT Modules
TDT provides several external modules for stimulus design and experiment templates for common operant conditioning protocols.
To make a TDT module available, right-click on empty space in the Code Tree and
select 'Add Python Module'. This loads the list of modules from
C:\TDT\Synapse\PynapseLibs and makes them selectable. The imported classes can
then be instantiated in your Python code.
Testing
You can right-click on any state, method, or Python file in the Code Tree and select 'Test'. This will load the source file and run every method inside of it. Any obvious errors that will come up at run-time (like naming problems) are shown in the Python Output window at the bottom, with a reference to the method and line number causing the error.
In the example below, setTimeout was incorrectly capitalized (should have used code completion!).
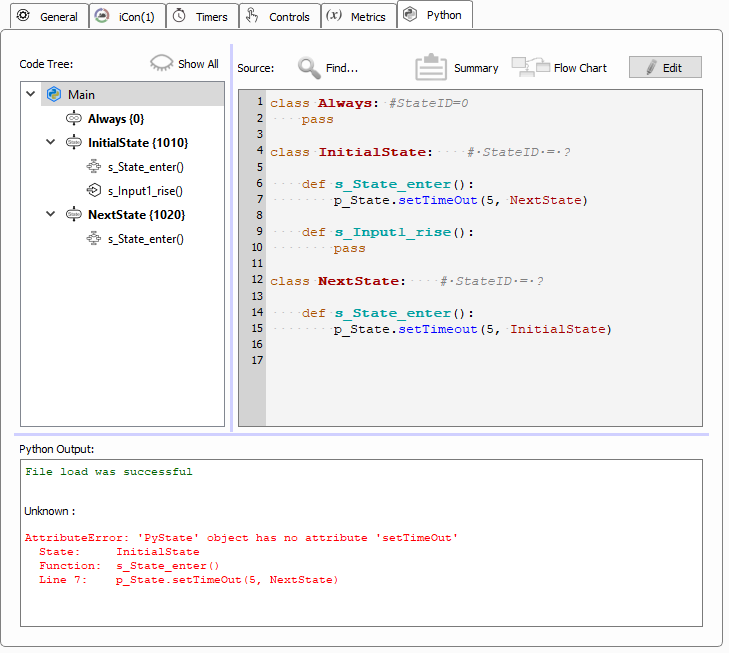
See Run-Time and Debugging for more debugging tips.