Installing RZ10x or RZ10x-U
Please carefully unbox your equipment. The back of your RZ10x will either have a USB interface (RZ10x-U model) or a fiber optic interface (RZ10x model). RZ10x devices have an optical interface with orange fiber optic cables. They can connect to the computer through either a PO5e Interface card or a UZ3 USB3.0 interface. Follow the instructions for your RZ10x model and interface type below.
PO5e Installation
If you have a TDT WS4 or WS8 workstation, then a PO5e card will already be installed along with TDT Drivers and Synapse software.
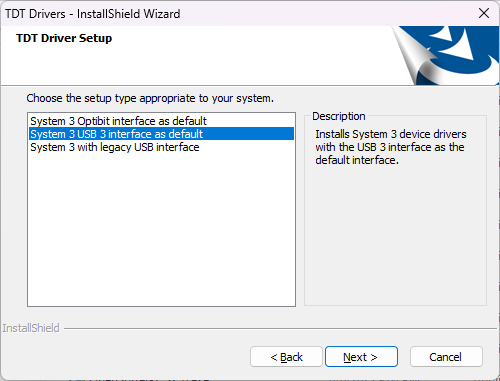
If you are using your own PC, power down your computer and place the PO5e card into an available full height PCIe slot in your computer. Next, install your TDT drivers and Synapse software from the USB Storage Drive that was provided with your shipment. During TDT Drivers installation, select the "System 3 Optibit interface" option.

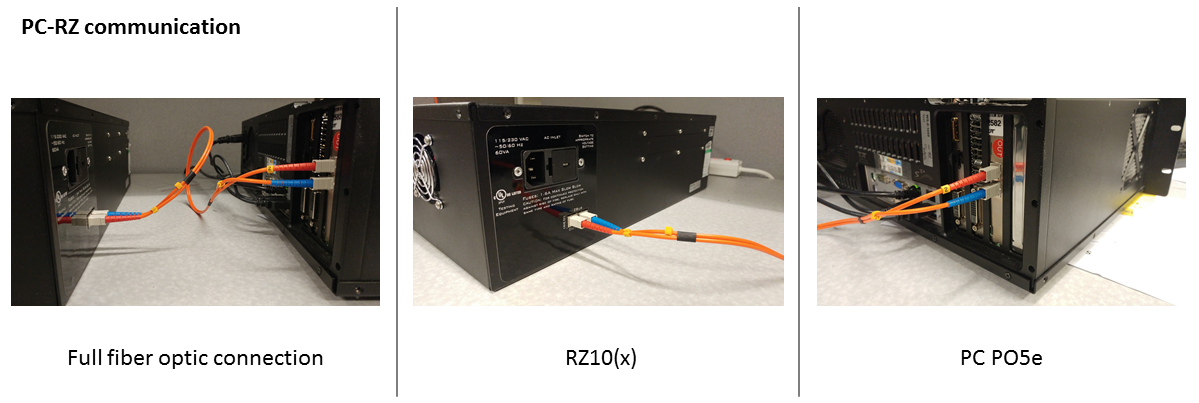
Once the PO5e card is seated and TDT drivers and software are installed, you are ready to connect the RZ10x processor and PC together. The orange fiber optic cables will be used for PC-RZ communication. Please connect the fiber optics to the correct ports on the RZ10x and PO5e card, as shown in the diagram below (red optical connector to 'Out' or Red-labeled ports on RZ and PC).
Continue to Testing Processor Communication.
UZ3 Installation
If you are using your own PC or laptop, install the TDT drivers and Synapse software from the USB Storage Drive that was provided with your shipment. During TDT Drivers installation, select the "System 3 USB 3 interface" option.
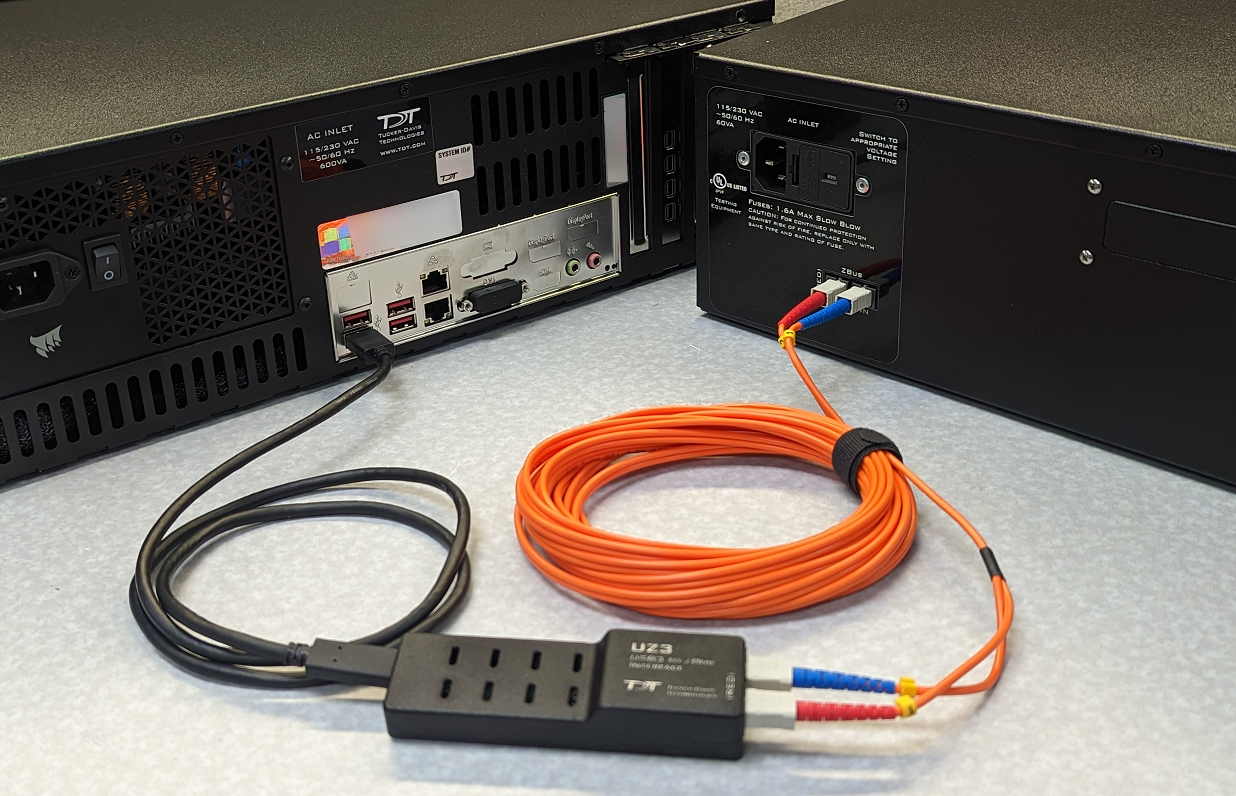
Once the TDT drivers and software are installed, you are ready to connect the RZ10x processor, UZ3, and PC together. The orange fiber optic cables will be used for UZ3-RZ communication. Please connect the fiber optics to the correct ports on the RZ10x and UZ3 card, as shown in the diagram below (red optical connector to 'Out' or Red-labeled ports on RZ and UZ3). Connect the UZ3 to a USB 3.0 port on your PC with the provided cable.
Important
The maximum USB 3 cable length is 3 meters total. Most PC front panel USB connectors have additional cable length inside to the motherboard, so use a maximum 2.5 meter cable if connecting to the front panel USB connectors. Otherwise use the back panel USB 3 connectors.
Continue to Testing Processor Communication.
RZ10x-U Installation
The RZ10x-U model has a built-in USB interface that can connect to any USB 3.0 port on your computer. If you have a TDT WS4 or WS8 workstation, then the software is already installed for you.
If you are using your own PC or laptop, install the TDT drivers and Synapse software from the USB Storage Drive that was provided with your shipment. During TDT Drivers installation, select the "System 3 USB 3 interface" option.
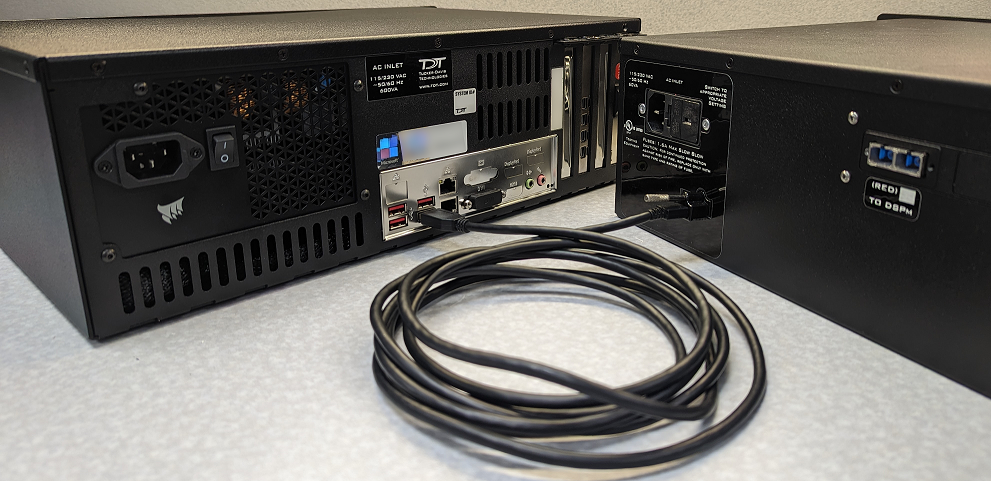
Once the TDT drivers and software are installed, you are ready to connect the RZ10x processor and PC together. Connect the RZ10x-U to a USB 3.0 port on your PC with the provided cable.
Important
The maximum USB 3 cable length is 3 meters total. Most PC front panel USB connectors have additional cable length inside to the motherboard, so use a maximum 2.5 meter cable if connecting to the front panel USB connectors. Otherwise use the back panel USB 3 connectors.
Testing Processor Communication
 |
| zBusMon with RZ10x Processor |
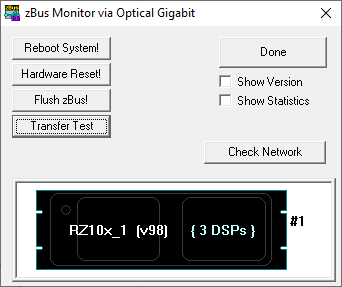
Turn the RZ10x on. The display screen on the processor should illuminate with information about the unit's DSP cards. To check whether there is communication between the RZ10x and the PC, open the zBusMon application from the desktop (shown to the right). The RZ processor should appear with information about the driver version and number of DSP cards. Click Transfer Test to test communication.
If you get an error upon performing an initial transfer test, try performing a 'Reboot System!' first. If there is a consistent error in zBusMon, reconnect the interface cable on the RZ and try again. If you continue to have errors or do not see your RZ appear, please contact TDT for assistance.
Attaching Perhipherals
If you have a PZ5 NeuroDigitizer for recording electrical biopotential signals synchronized to your fiber photometry signal, or an iCon Interface Console for connecting to behavioral cage elements, connect that to the front panel optical port on the RZ10x and power it on.
Launching Synapse
With your RZ10x on and connected, launch Synapse from the desktop. If the Licensing Dialog appears, follow the instructions in the Synapse License FAQ to send a licensing request to TDT. Synapse runs for 30 days before requiring a license key. Make sure you select the Fiber Photometry package.
The Rig Editor will then appear, but it will be blank. Click Detect for Synapse to recognize your RZ10x. The RZ10x and three DSPs will show up in the tree. If you have a PZ5 or iCon, this will appear under DSP 3. If you have a Medusa4Z BioAmp for up to four channels of biopotential data connected to the front legacy optics, you can manually add the device by right-clicking RZ10x → select "Add RAn". It defaults to the Medusa4Z model. Finally, click Ok to exit the Rig Editor.
The Rig Editor may be accessed later for modification through the Synapse Menu if your hardware changes. For example, to add USB cameras for low frame rate (20 fps or less) subject monitoring follow this Lightning Video.
Upon exiting the Rig Editor, your processor and any peripheral equipment declared in the Rig Editor will appear in the Processing Tree.
Detecting Your Fiber Photometry Equipment
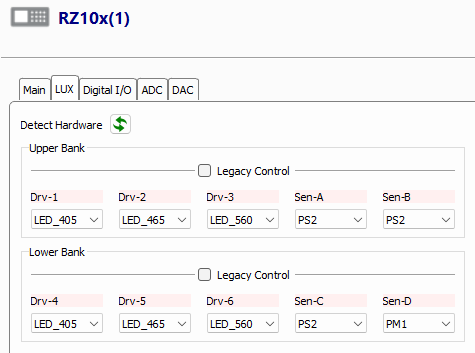
Click on the RZ10x in the Processing Tree, then click on the 'Lux' tab. Click 'Detect Hardware' to automatically identify the RZ10x LED and sensor configuration.
 |
| Automatically Detect Connected LEDs and Sensors |
Make sure everything matches what you see on the front of the physical RZ10x.
Adding the Fiber Photometry Gizmo
For basic fiber photometry recordings, the experimental setup is simple. With the RZ10x selected, find the Fiber Photometry gizmo in the Specialized category. Drag and drop the gizmo onto the RZ10x to form a connection.
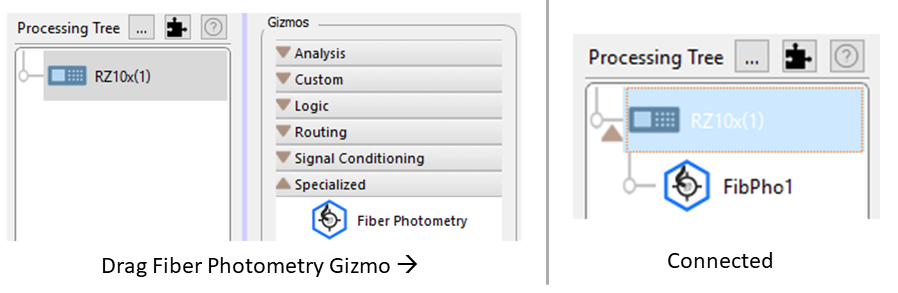
The Fiber Photometry gizmo reads the Lux components from the RZ10x that were detected in the previous step. See the Fiber Photometry Gizmo section for more details.
Note
You must be running TDT Drivers and Synapse Version 94 or later.
You can learn more about gizmos and experimental connections in the Synapse Manual.
Continue to the Optical Connections section.