iCon Behavioral Control Interface
The iCon is a behavioral control interface designed to support easy or complex behavioral experiments. It has interchangeable analog and digital modules to fit the needs of any experimental paradigm. It can control most third-party behavioral chambers with TDT's Synapse software — resulting in high-bandwidth, precision control of behavioral hardware with real-time signal monitoring.
The iCon interface comes in two different versions:
-
The "iCon" has an optical communication port ("iCon") to interface to an RZ processor with a DSP-M card. The iCon runs at the RZ system sampling rate, up to a maximum 50 kHz.
-
The "iConZ" has a USB 3 connector ("iConZ") to connect directly to a PC or laptop. The iConZ has its own onboard digital signal processors (DSPs) and supports ~6 kHz sampling rate, though modules such as the iMn support higher sampling rate onboard processing. These built-in DSPs will appear as an "RZ3" in zBusMon and Synapse software.
The iCon is available with two (iCon-2/iConZ-2), four (iCon-4/iConZ-4), or six (iConZ-6 only) module slots.
Physical Setup
iCon
The iCon connects to a DSP-M or optical QZDSP card in your RZ processor.
| Single iCon connected to a DSPM card in an RZ5D |
You can connect multiple iCons to the same DSP interface card.
| Two iCons connected to a single DSPM card in an RZ5D |
iConZ
The iConZ connects to a USB 3 port on your PC or laptop.
| iConZ connected to PC |
You can connect one iConZ per computer. To use multiple iConZ interfaces simultaneously, you need one laptop per iConZ, or a dedicated iPac Workstation to manage up to eight at once.
Features
Power
The iCon is powered by an integrated switched-mode power supply. The power supply auto-detects your region's voltage setting and no further configuration is needed. The power switch is located on the back panel.
Status Light
The iCon front panel display Status light reports system connection information.
I/O Control
At the most basic the TDT iCon system can replace existing devices such as the Med Associates, Colburn or Lafayette systems that interface to a standard operant or behavioral box with input and output lines, where the output lines drive feeders, lick meters and other devices that require more than a digital trigger. At the more complex level the TDT system can be used to send and receive complex signals to control multiple hardware devices.
Replicating an Existing Behavioral Control System
The TDT system provides a unifying interface for sending and receiving behavioral information from a behavioral control box without the need for the external devices from these other companies.
iCon Control
The iCon can be controlled in the following ways:
-
Bi-directional real-time communication between the iCon and an RZ processor, running in Synapse.
-
Client software using the SynapseAPI to control the iCon outputs through Synapse.
-
Pynapse Python Coding Gizmo in Synapse controlling the iCon outputs and managing full behavioral state control.
The iCon object in Synapse lets you configure how the iCon modules are controlled (either through real-time signals on the RZ itself, client-controlled via the SynapseAPI, or directly integrated in a Pynapse gizmo) and how to route iCon input state changes for storage or further closed-loop processing.
Installation Notes
When adding modules to an existing iCon, note that:
-
The iV1 and iV2 can't be installed in the bottom slot of iCon-2, iConZ-2, iCon-4, iConZ-4, iConQZ-4, or iConQZ-6 devices.
-
The iX6, iX7, iV1, iV2, iD2, iA16, iA32, and any iMn device can't be installed in the bottom two slots of iConZ-6 devices.
The Synapse Rig will give you a warning if it detects a bad device configuration.
Module Removal Instructions
-
Turn the power switch on the back of the iCon to the Off position.
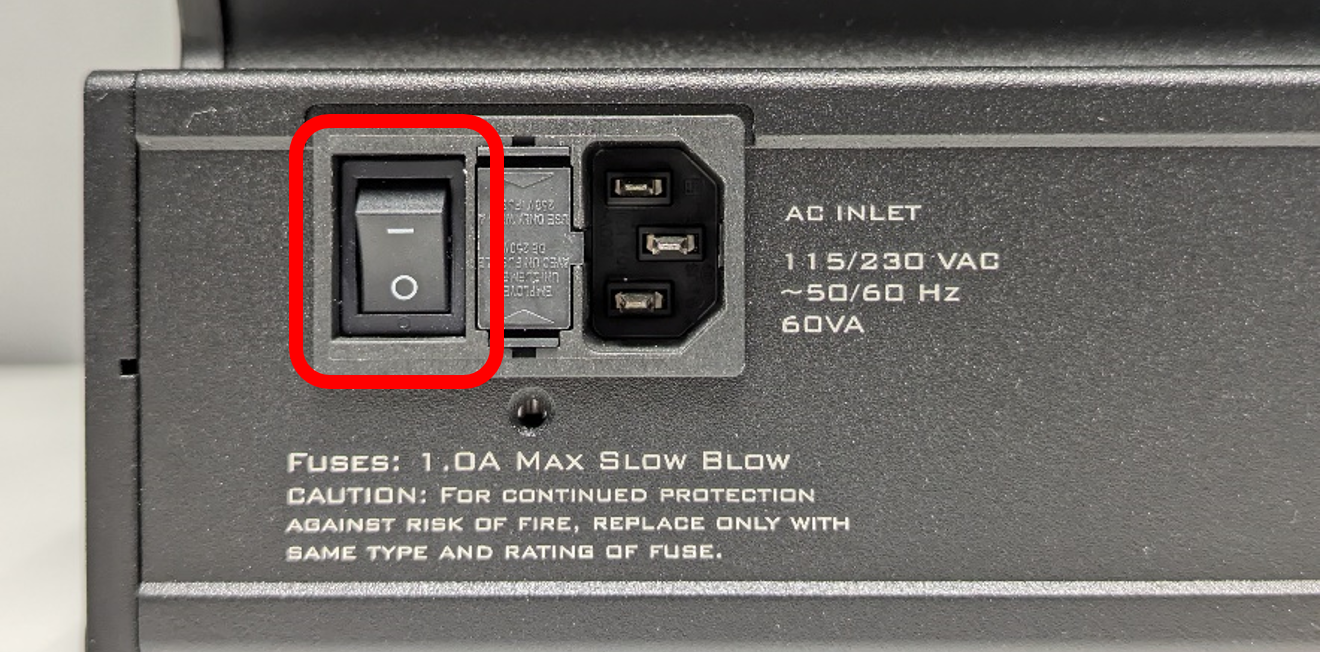
iCon4 with power switch off -
Loosen the four thumbscrews on the sides of the iCon.
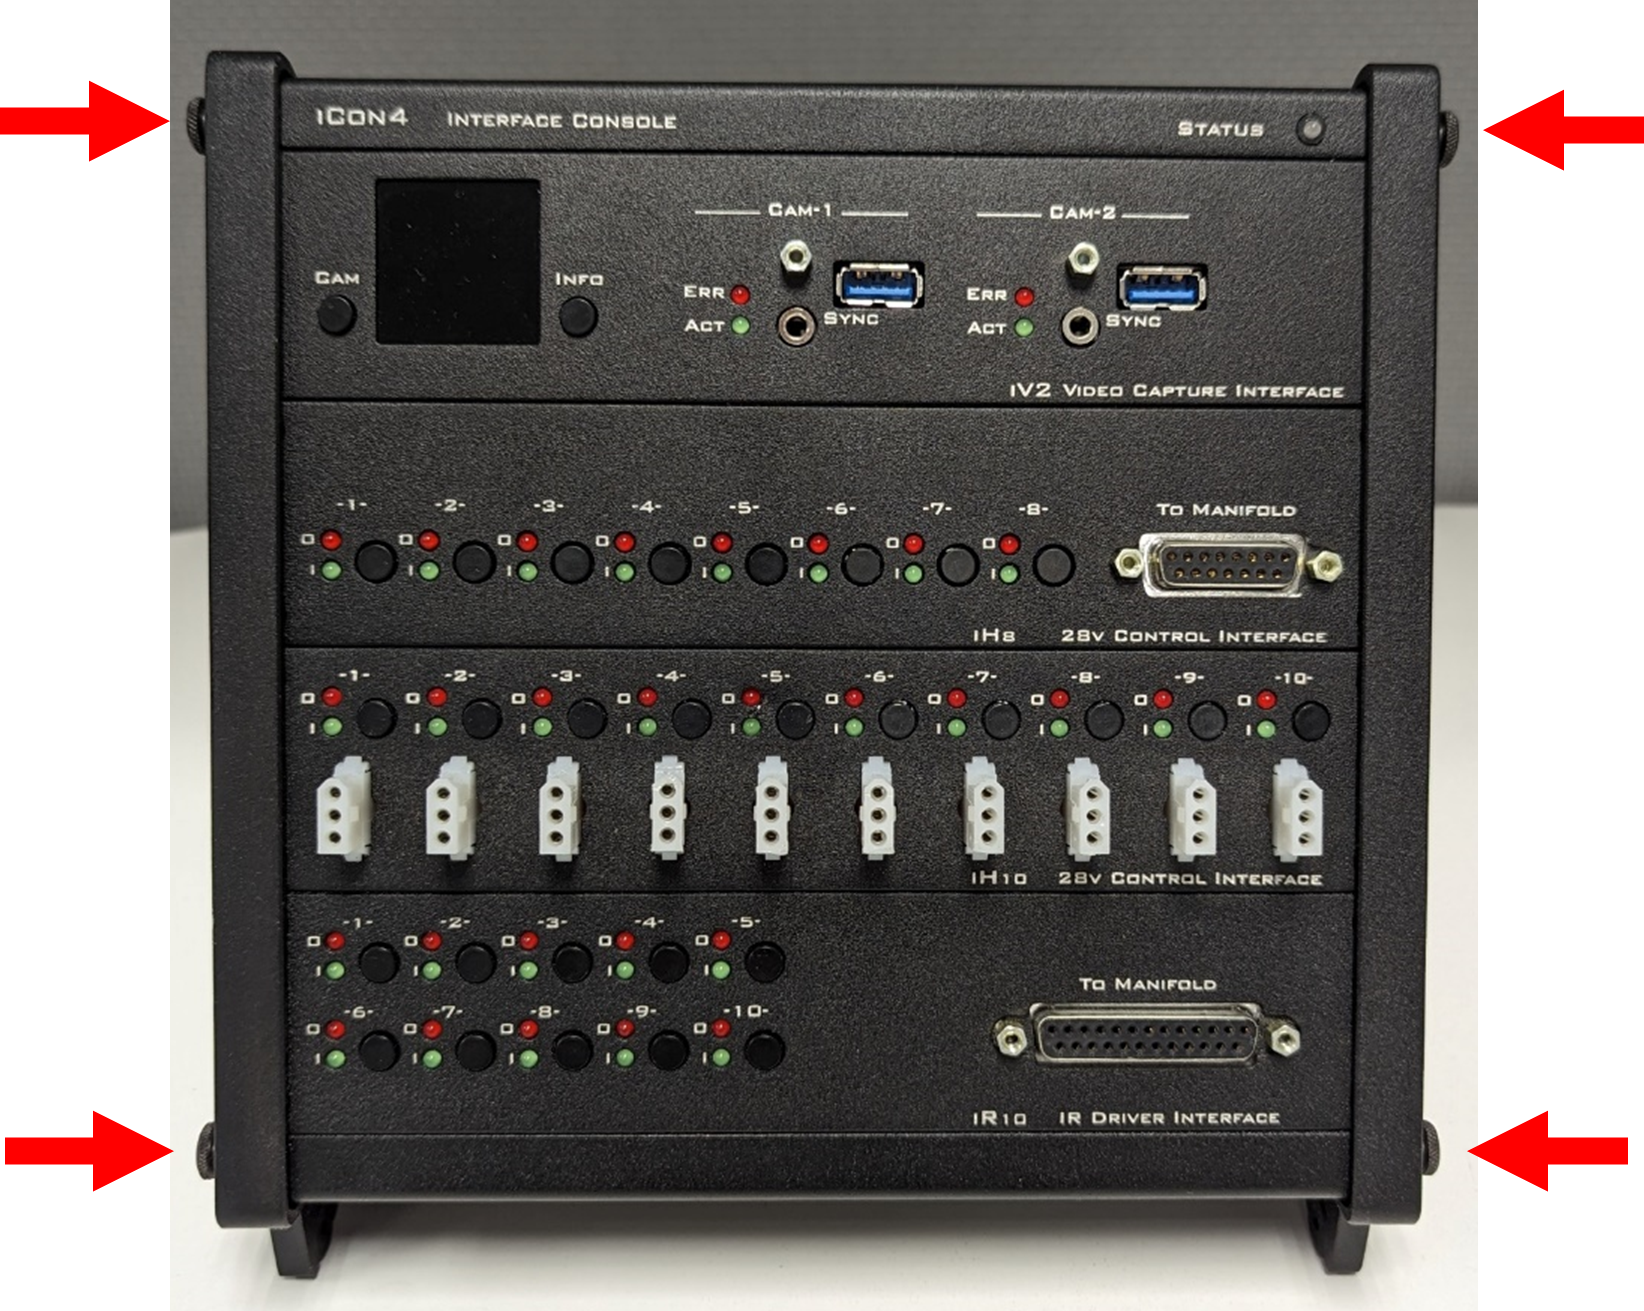
Location of thumbscrews on iCon4 -
Remove the side rails and set them aside.
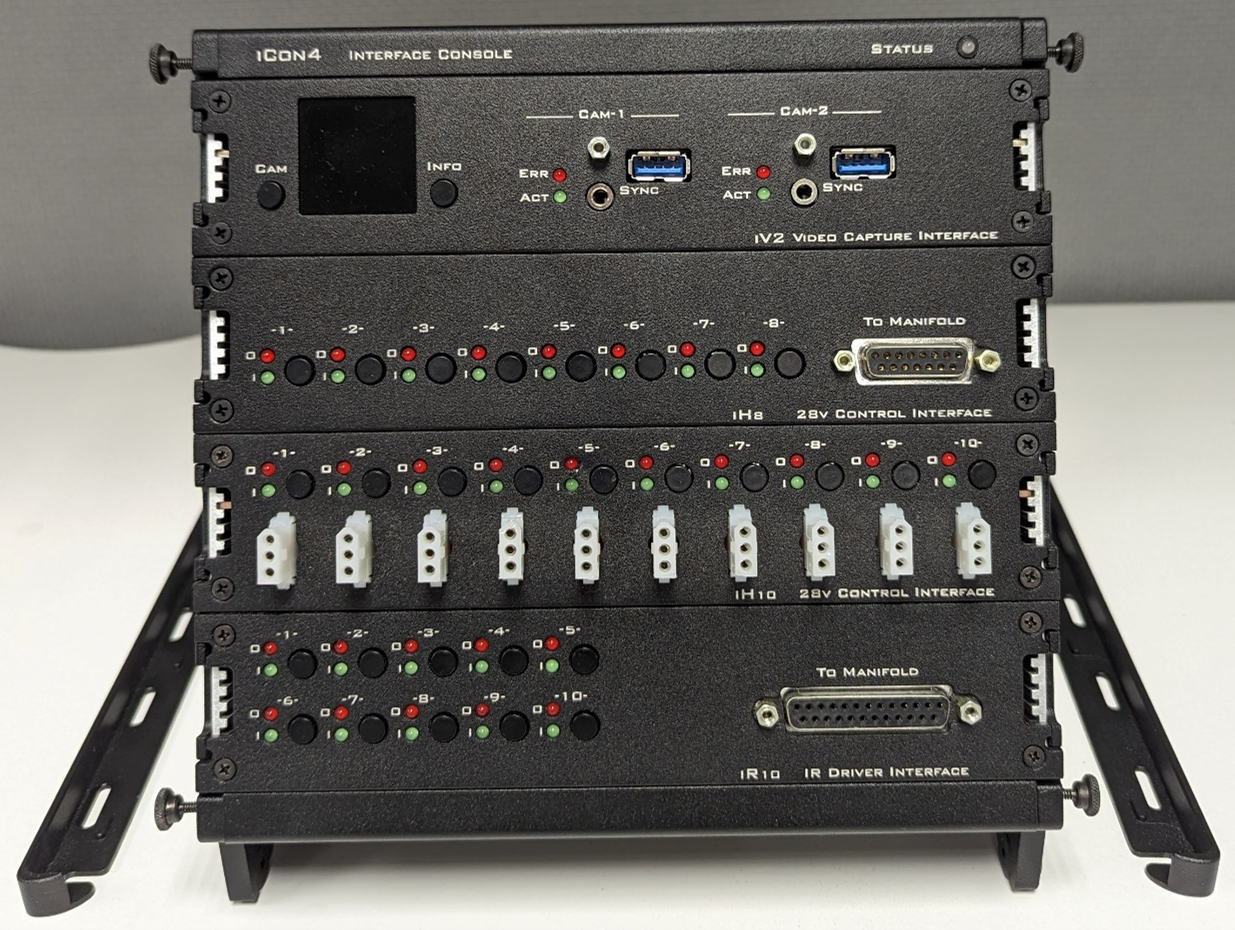
iCon4 with side rails removed -
With both hands, use the tabs on the module faceplate to pry straight out.
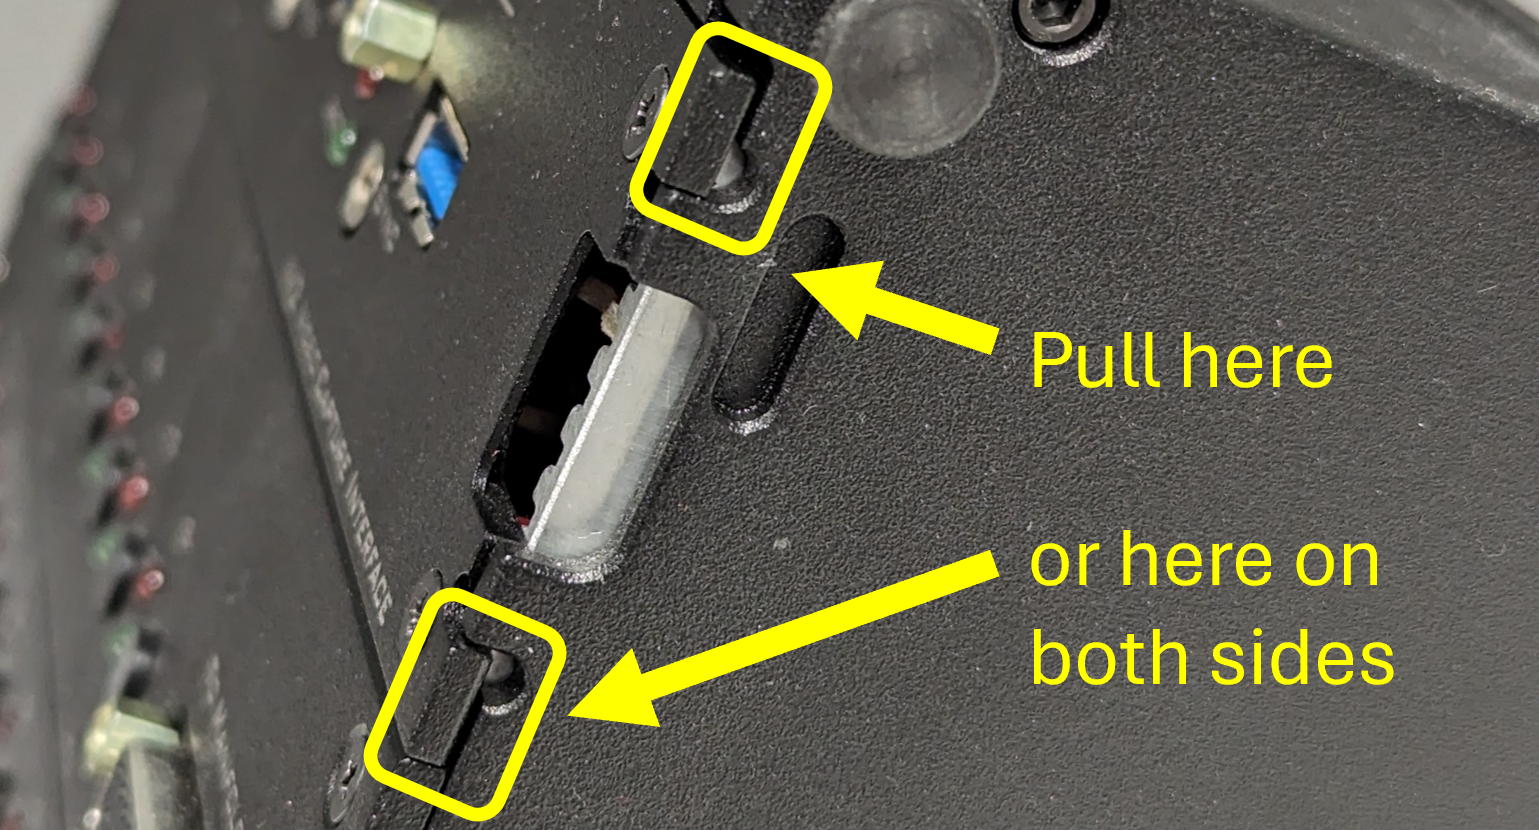
Location of module pull tabs 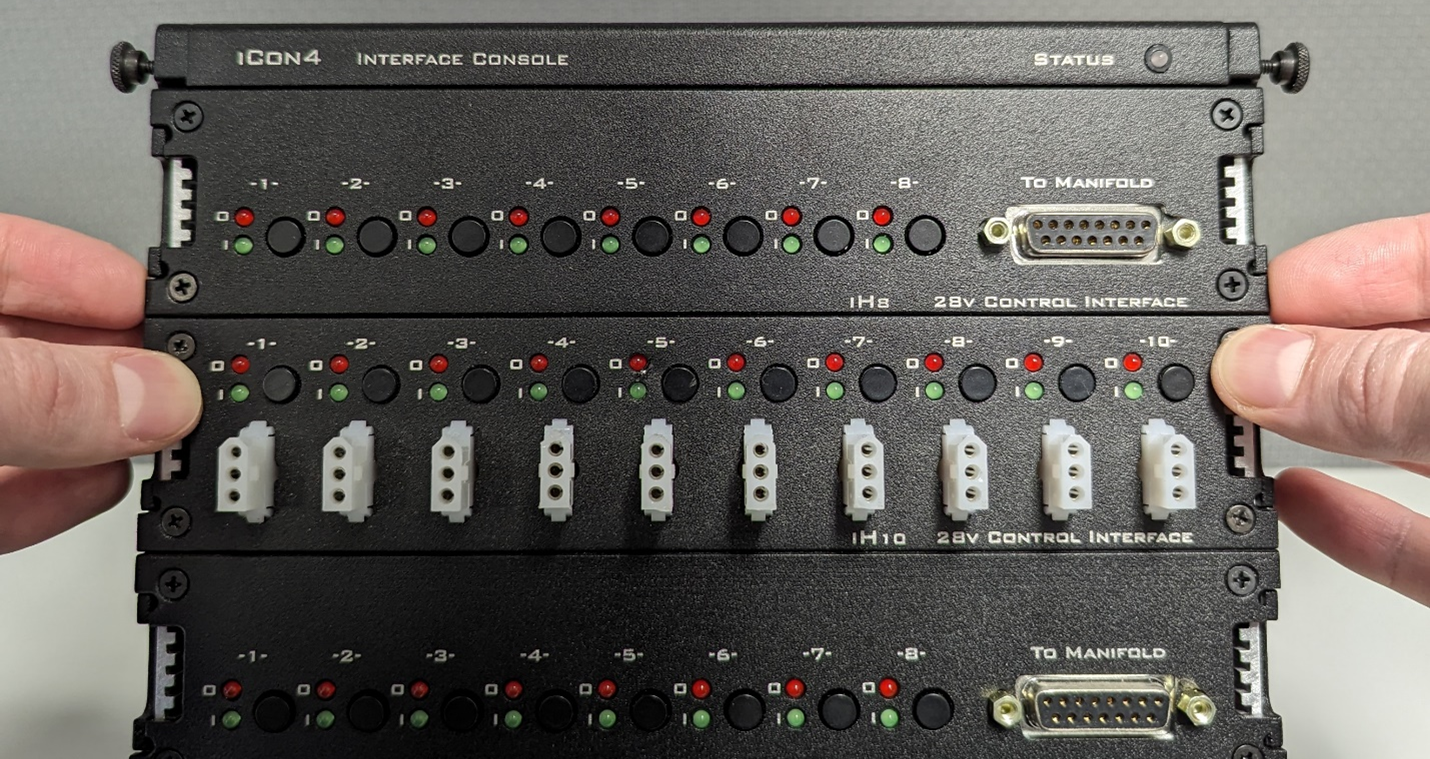
Example grip for removing the top module. Pull the module tabs on both sides while bracing against lower modules If there is already an empty slot, modules can be removed by pulling on the faceplate lip
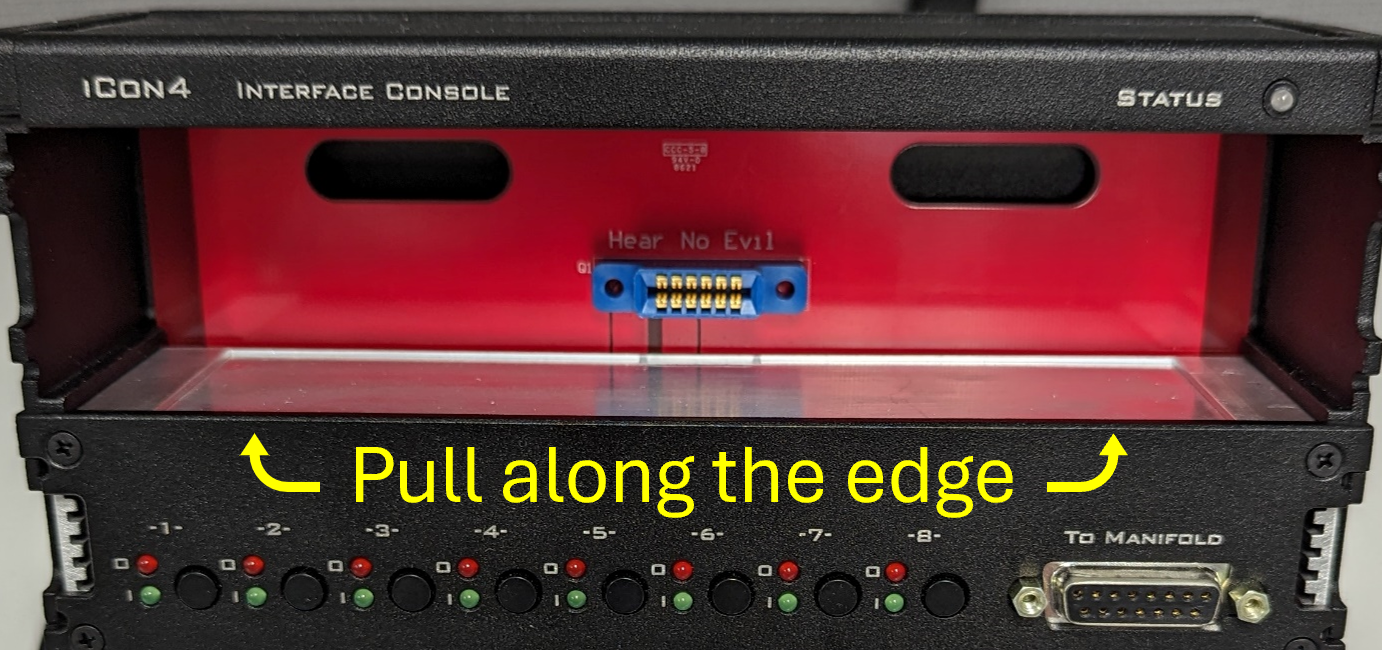
Removing a module next to an empty slot