iPac Multi-Node Behavioral Controller
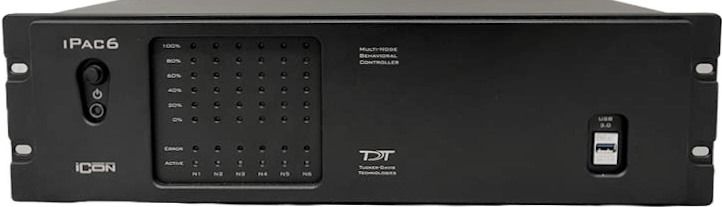 |
| iPac6 shown - iPac Includes Keyboard, Mouse, and Monitor (not shown) |
iPac Overview
The iPac controls multiple behavioral cages from one workstation. Inside the box there is a master computer running four (iPac4), six (iPac6), or eight (iPac8) virtual machines. Each virtual machine is running a full Windows 10 or 11 operating system with TDT's Synapse software and has a direct connection to the iConZ Behavioral Controller Interface integrated RZ3 processor via USB. The RZ3 processor includes two DSP cores which are optimized for real-time behavioral control.
The master computer runs an application called iPacConsole that connects to all iPac node virtual desktops. Each node runs a special version of Synapse called SynCon that connects to the RZ3 and attached iConZ. There is a 1 TB shared drive that serves as the TDT data storage for all the node computers.
Power and Interface
The iPac comes factory installed with USB 3 interface cards to connect to iConZ devices.
The power supply is auto-switching for 110 V or 220 V. Soft on/off buttons for the master computer are on the front panel and a hard power cutoff switch is on the back panel. The Master power button turns on all nodes and the Master. A brief press (<1 second) of the Master power button initiates Windows shutdown on the Master and all nodes.
Hardware Setup
Use the provided USB type C to A cables to connect the TDT iConZ devices to the iPac USB ports labeled Node-1 to Node-8. Multiple iConZ connections should be placed in order, starting with Node-1 at the top.
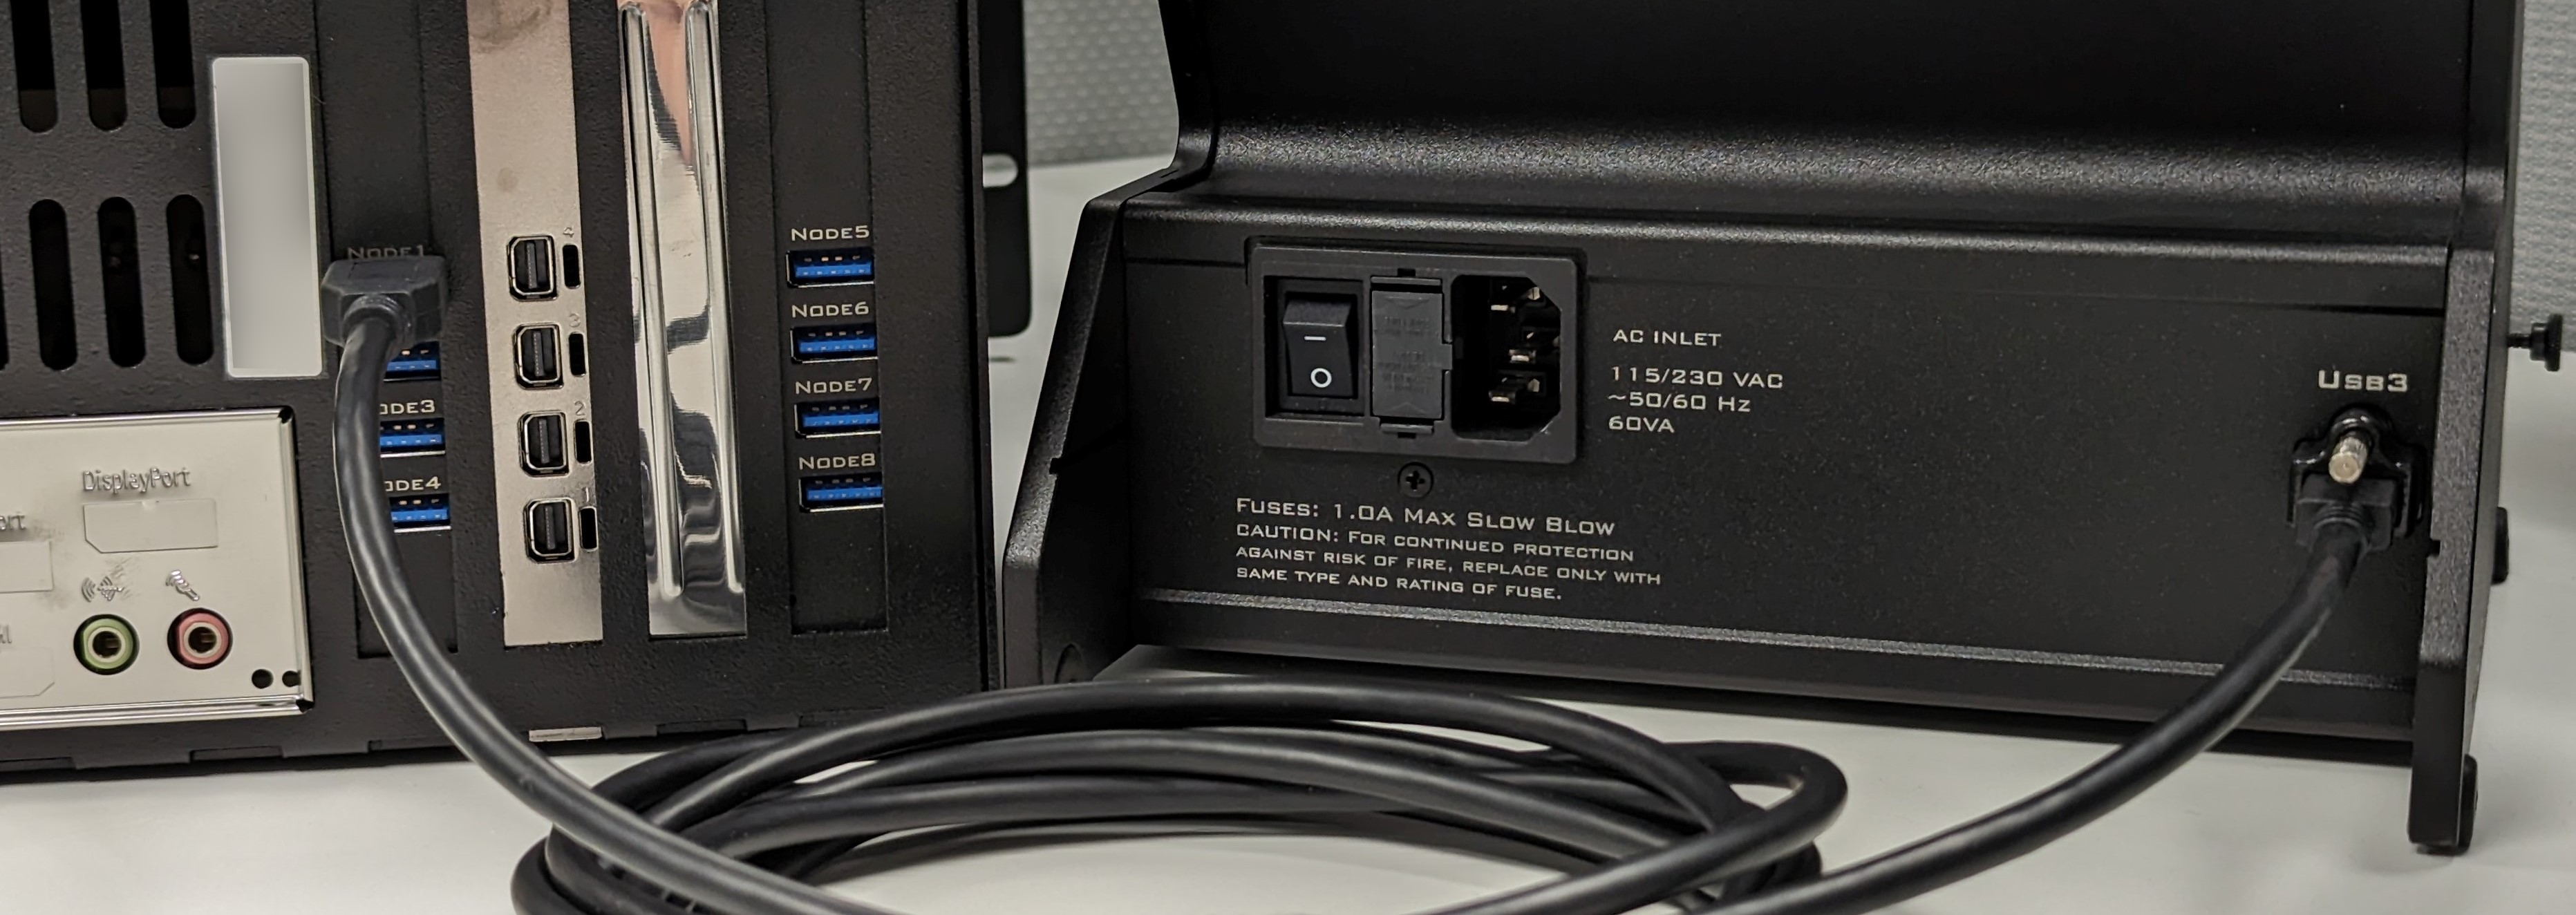 |
| iConZ Connected to Node-1 on the iPac |
iPac Features
Status Lights
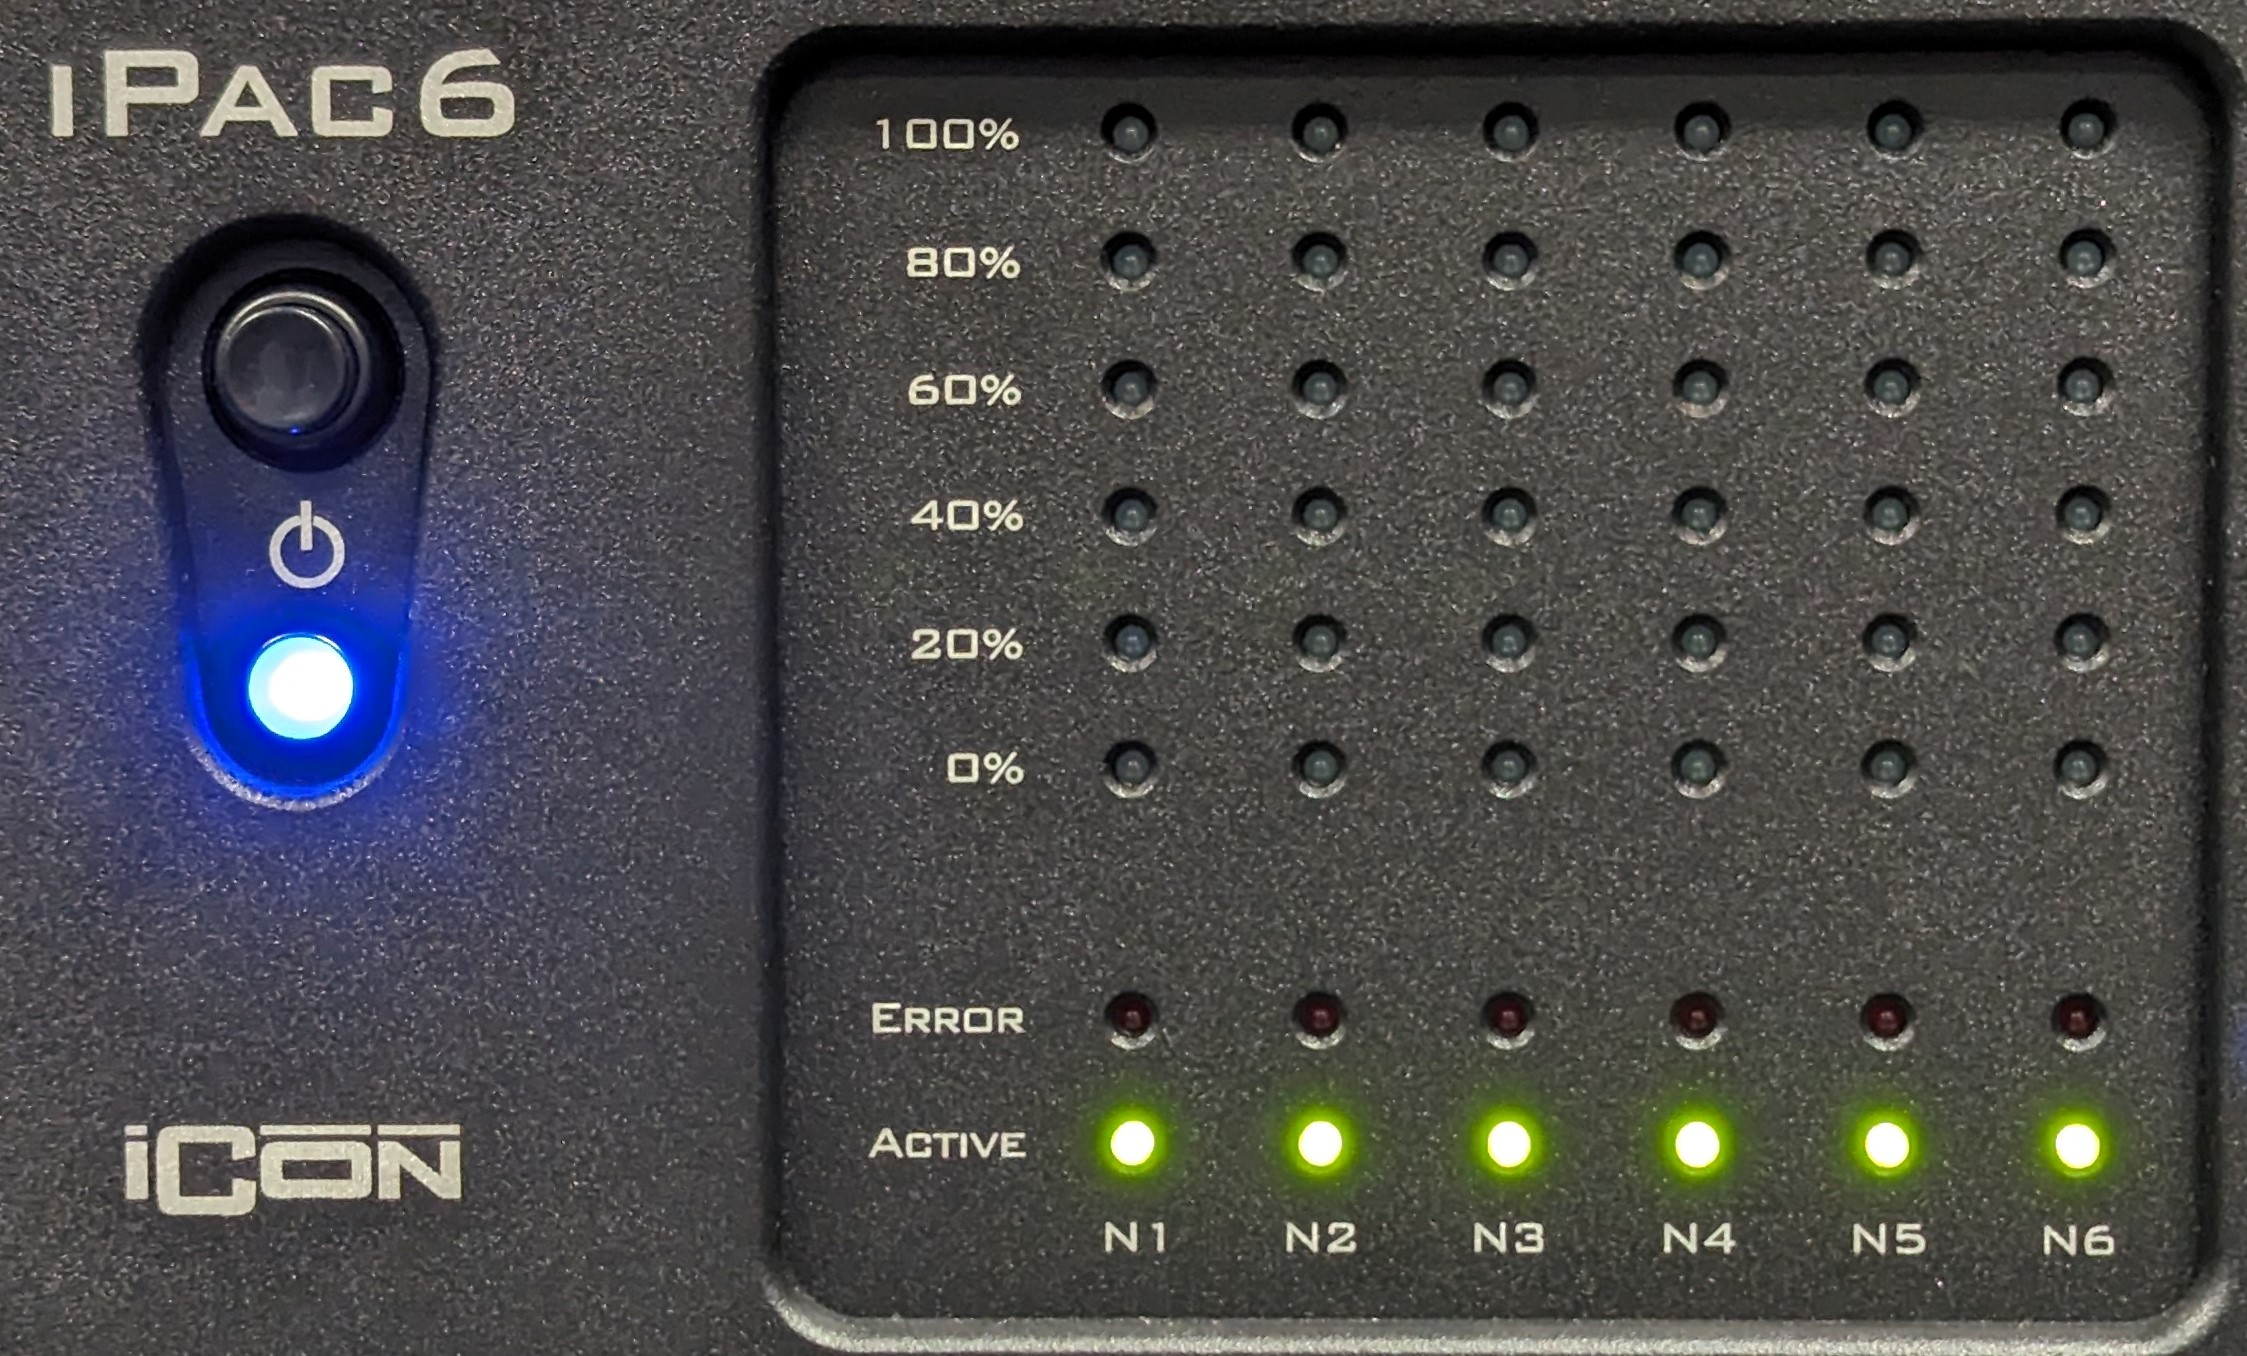 |
| iPac Front Panel LEDs |
The Master LED is blue when powered on. The LEDs for each node indicate the following status information:
Note
The blue progress LEDs can indicate several things depending on the experiment configuration:
-
If a progress bar Pynapse control named "Progress" has been created, the blue LEDs will show the value of that bar (0-100).
-
If using Session Mode Controls in Pynapse, the LEDs will indicate session progress.
-
If neither of the above are used, the LEDs will indicate elapsed time. If less than one hour has elapsed, each 20% increment represents 12 minutes. After one hour, each 20% increment represents two hours up to a maximum of 10 hours (100%).
Hard Drives
The Master PC system hard drive (C:) ships with Windows 10 or 11 and TDT's iPacConsole Software.
The Master shared drive (D:) is available to all the nodes. To connect to the shared
drive from a node, navigate to the node's Z:\ drive. It is used for saving data and
subject/experiment sharing. See Tank Data Location and
Sharing Experiments and Subjects below.
The shared drive is also accessible to other computers on the same network as the iPac. To
navigate to the shared drive from another computer on the network, navigate to
\\IP{NNNN}-MASTER\Shared\ in Windows Explorer, where {NNNN} is the iPac serial number. If prompted,
connect as user iPacMaster (default password is tdt).
Video Support
The iPac has four Mini DisplayPort outputs. It comes with a 34" ultra-wide monitor.
Input/Output Connections
The iPac includes one front panel USB 3.1 port for data transfer, and four USB 3.2 Gen 2 ports on the back for mouse, keyboard, and other USB devices. It includes Gigabit Ethernet ports for external networking. Two USB extension cables are included so the keyboard and mouse can be farther away from the iPac. The extension cables are not compatible with iConZ devices and should only be used for the mouse and keyboard.
Back Panel Connections

Note
The provided mouse and keyboard connect via the USB ports labeled "3" above. iConZ devices should only be used on USB ports labeled Node1-8, labeled "5" above.
iPac Master PC Technical Specifications
iPac Operation
-
Press the master power on the front of the unit. This powers on the Master computer and all nodes.
-
A black Proxmox login page will be displayed first and will automatically log in after a short period of time. No input from the user is necessary here. Wait for the standard Windows login page and log in as user
iPacMaster(the default password istdt).Important
It is normal for the screen to remain black or on the Proxmox login screen for 5-10 minutes during boot. The iPac is continuing the startup process in the background. No user input is needed until the Windows login screen.
-
Launch iPacConsole
 after logging in. This
is used to remotely connect to all the nodes. After launch, the nodes will begin connecting
one by one. This example uses an iPac6:
after logging in. This
is used to remotely connect to all the nodes. After launch, the nodes will begin connecting
one by one. This example uses an iPac6: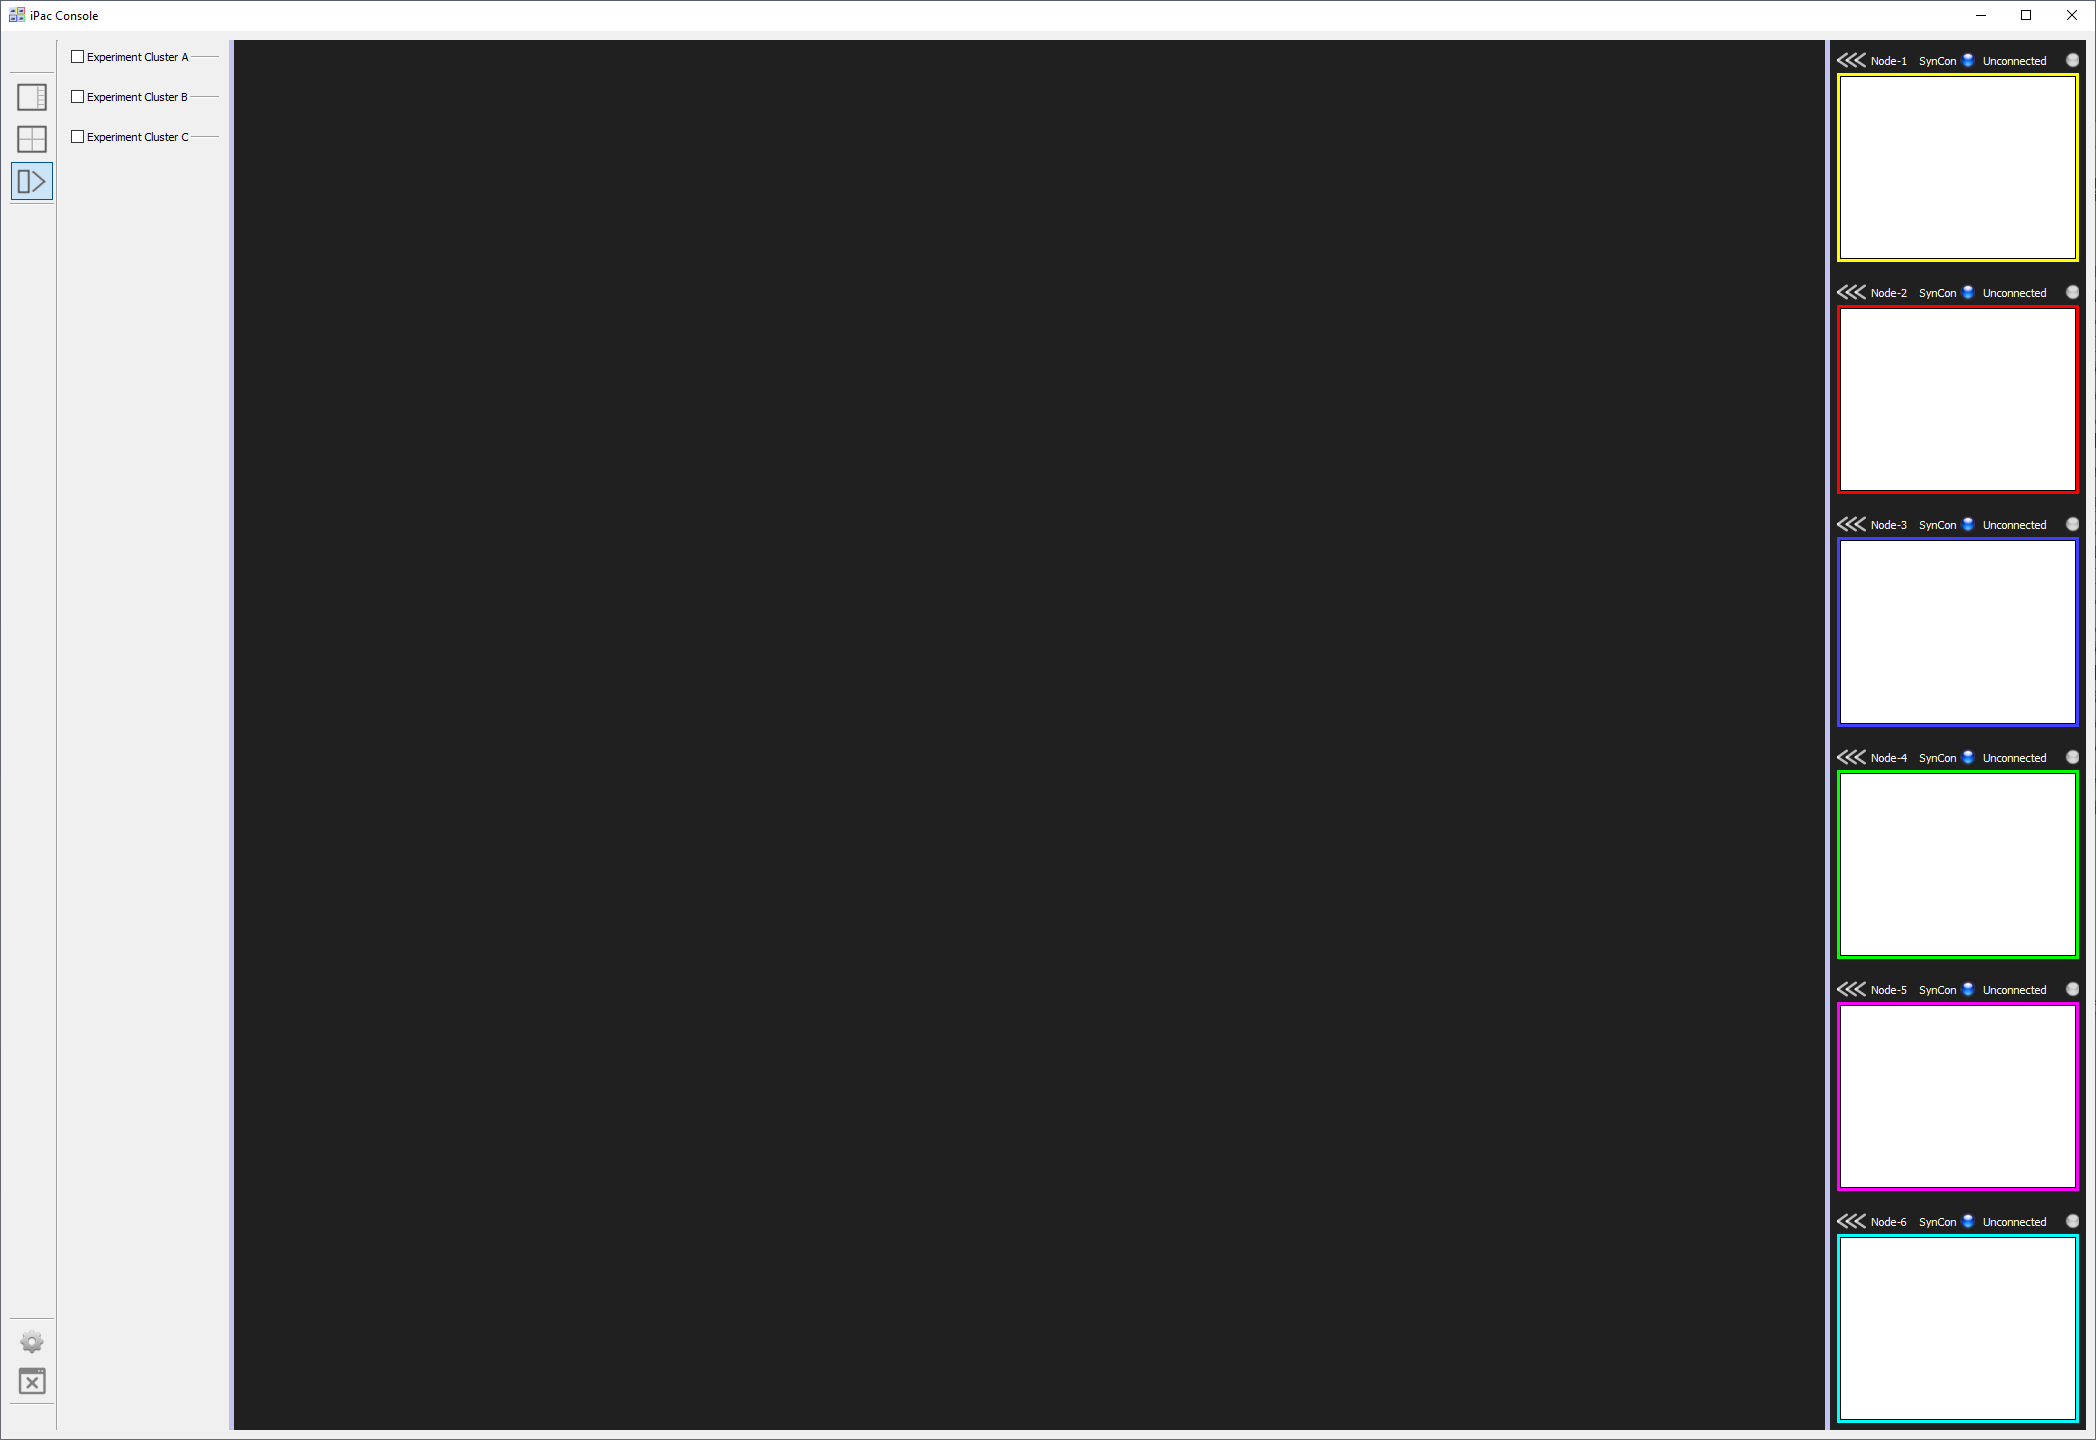
iPac6 With Disconnected Nodes -
Click on the
<<<symbol above a node to enlarge it.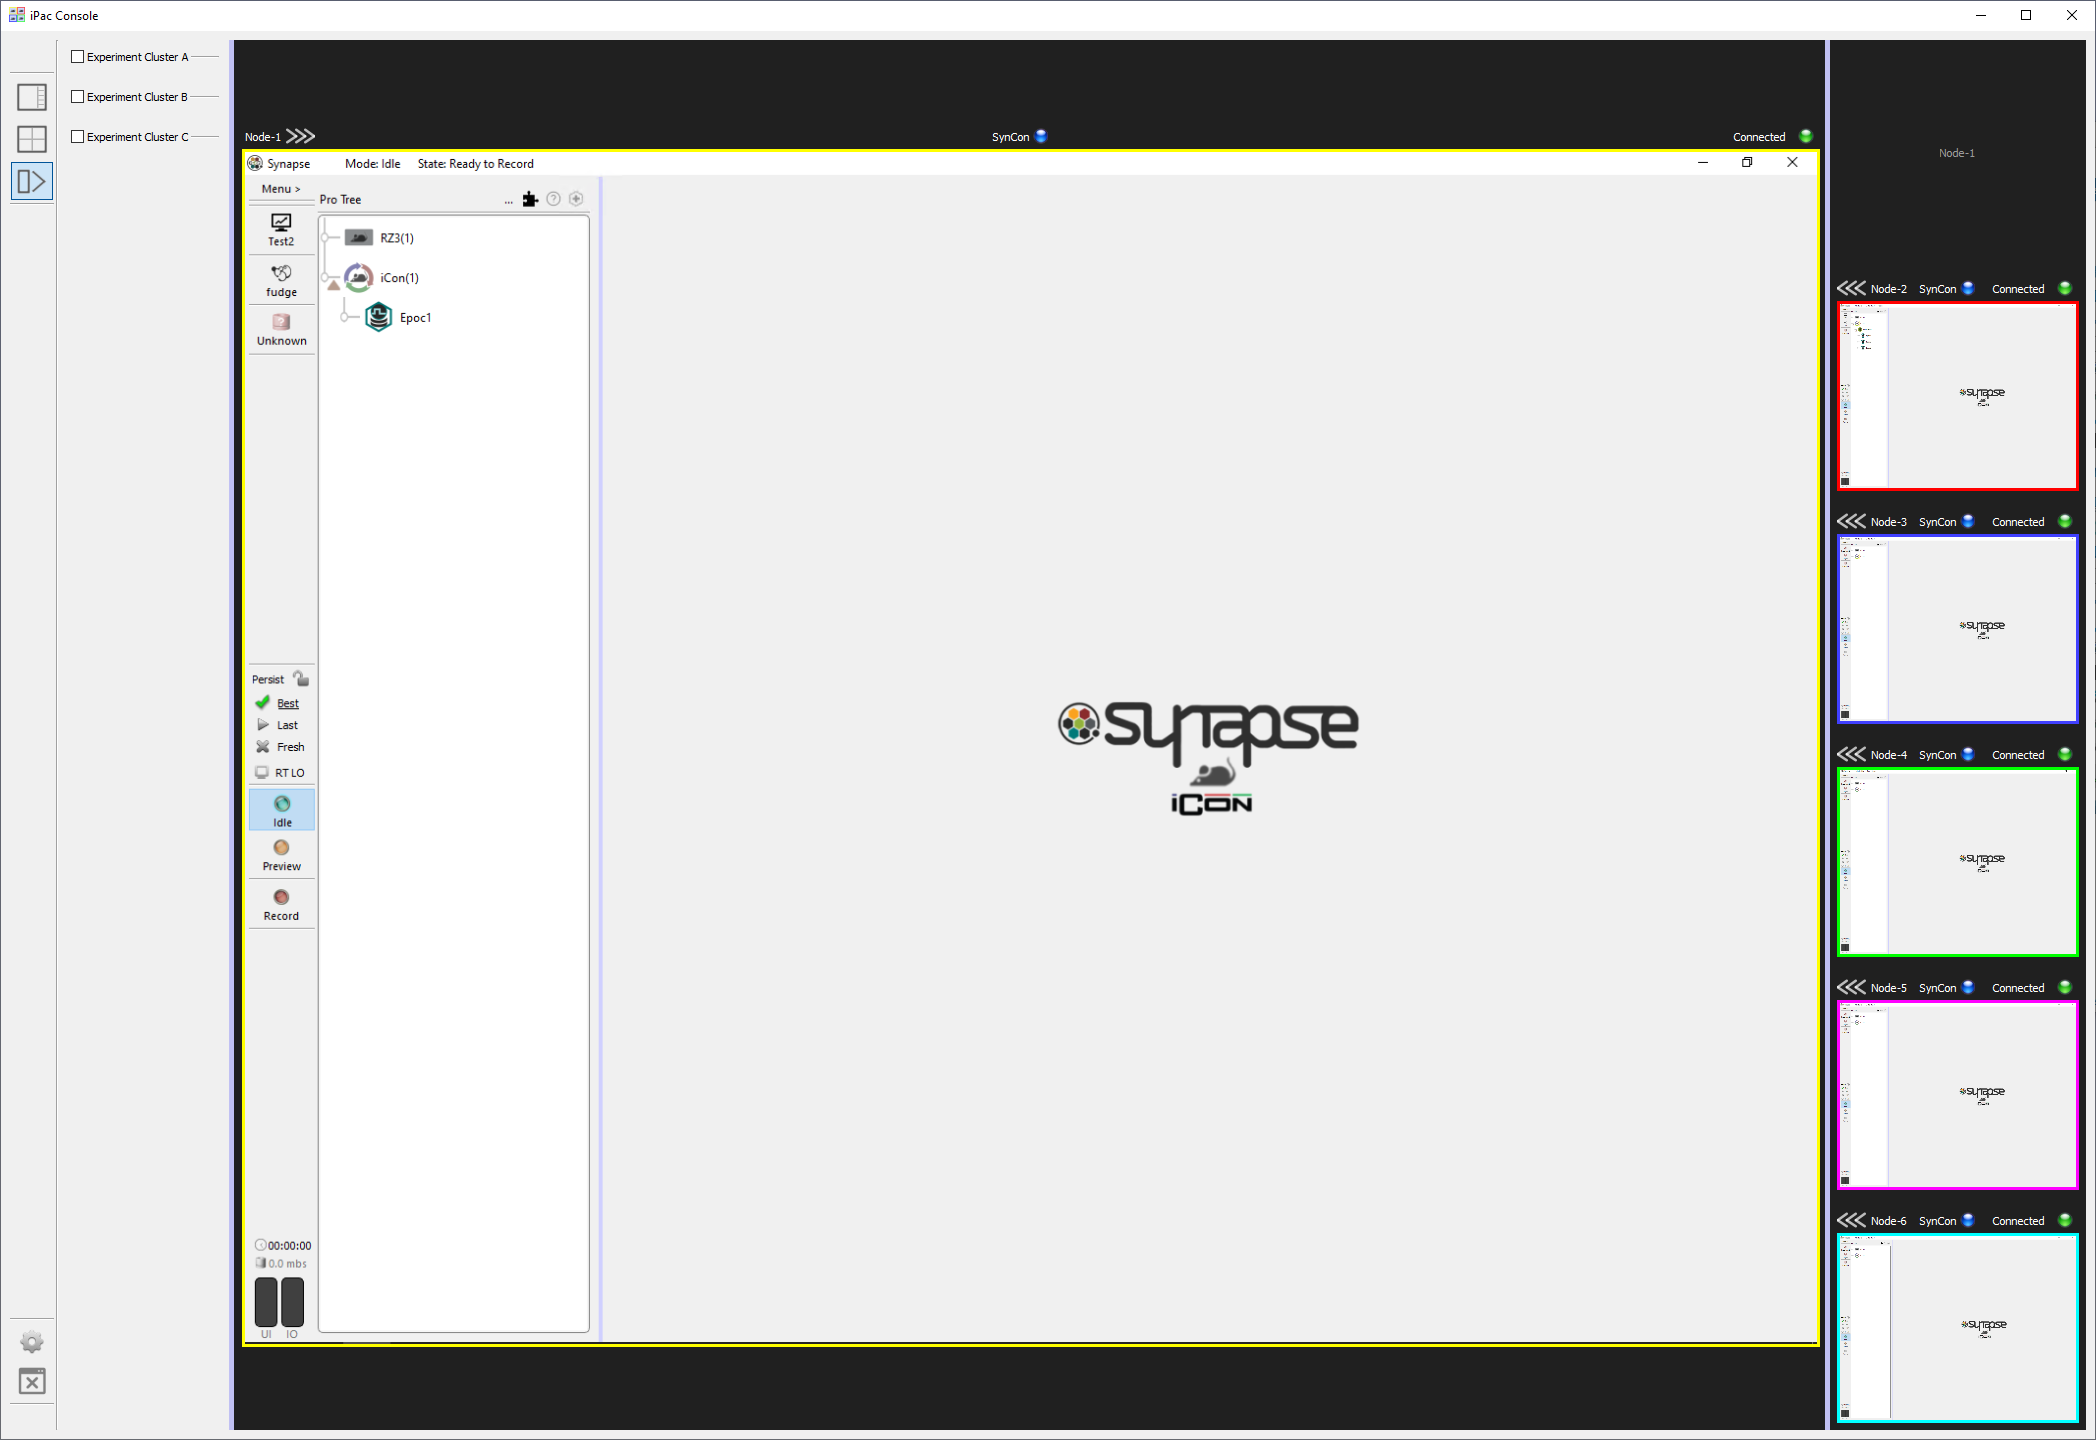
iPac6 With Connected Nodes The remote desktop status is shown at the upper right of each node screen. Clicking the connection status will disconnect a connected node or attempt to reconnect a disconnected node. Occasionally the connection may fail to initialize. If a node repeatedly fails to connect, try closing iPacConsole and starting it again, or rebooting the iPac.
-
Each node can be used like a standalone Windows computer connected to an iConZ. See SynCon Software below for more information.
-
Click the
 icon on the lower left of iPacConsole to close it.
 -
Safely shut down the entire system by briefly (<1 second) pressing the Master power button. This initiates a standard Windows shutdown on all nodes and the Master. Do not use the Windows start menu to shut down or restart, this will not turn off the hardware.
iPacConsole Settings
Click the gear icon on the bottom left toolbar to open the iPacConsole settings. Here you can change the screen resolution for each node.
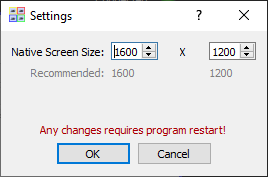 |
| iPacConsole Settings |
Node Desktop Layout
On the left toolbar of the iPacConsole there are node layout options. There are two default layouts to choose from. Nodes are ordered from left to right and from top to bottom.


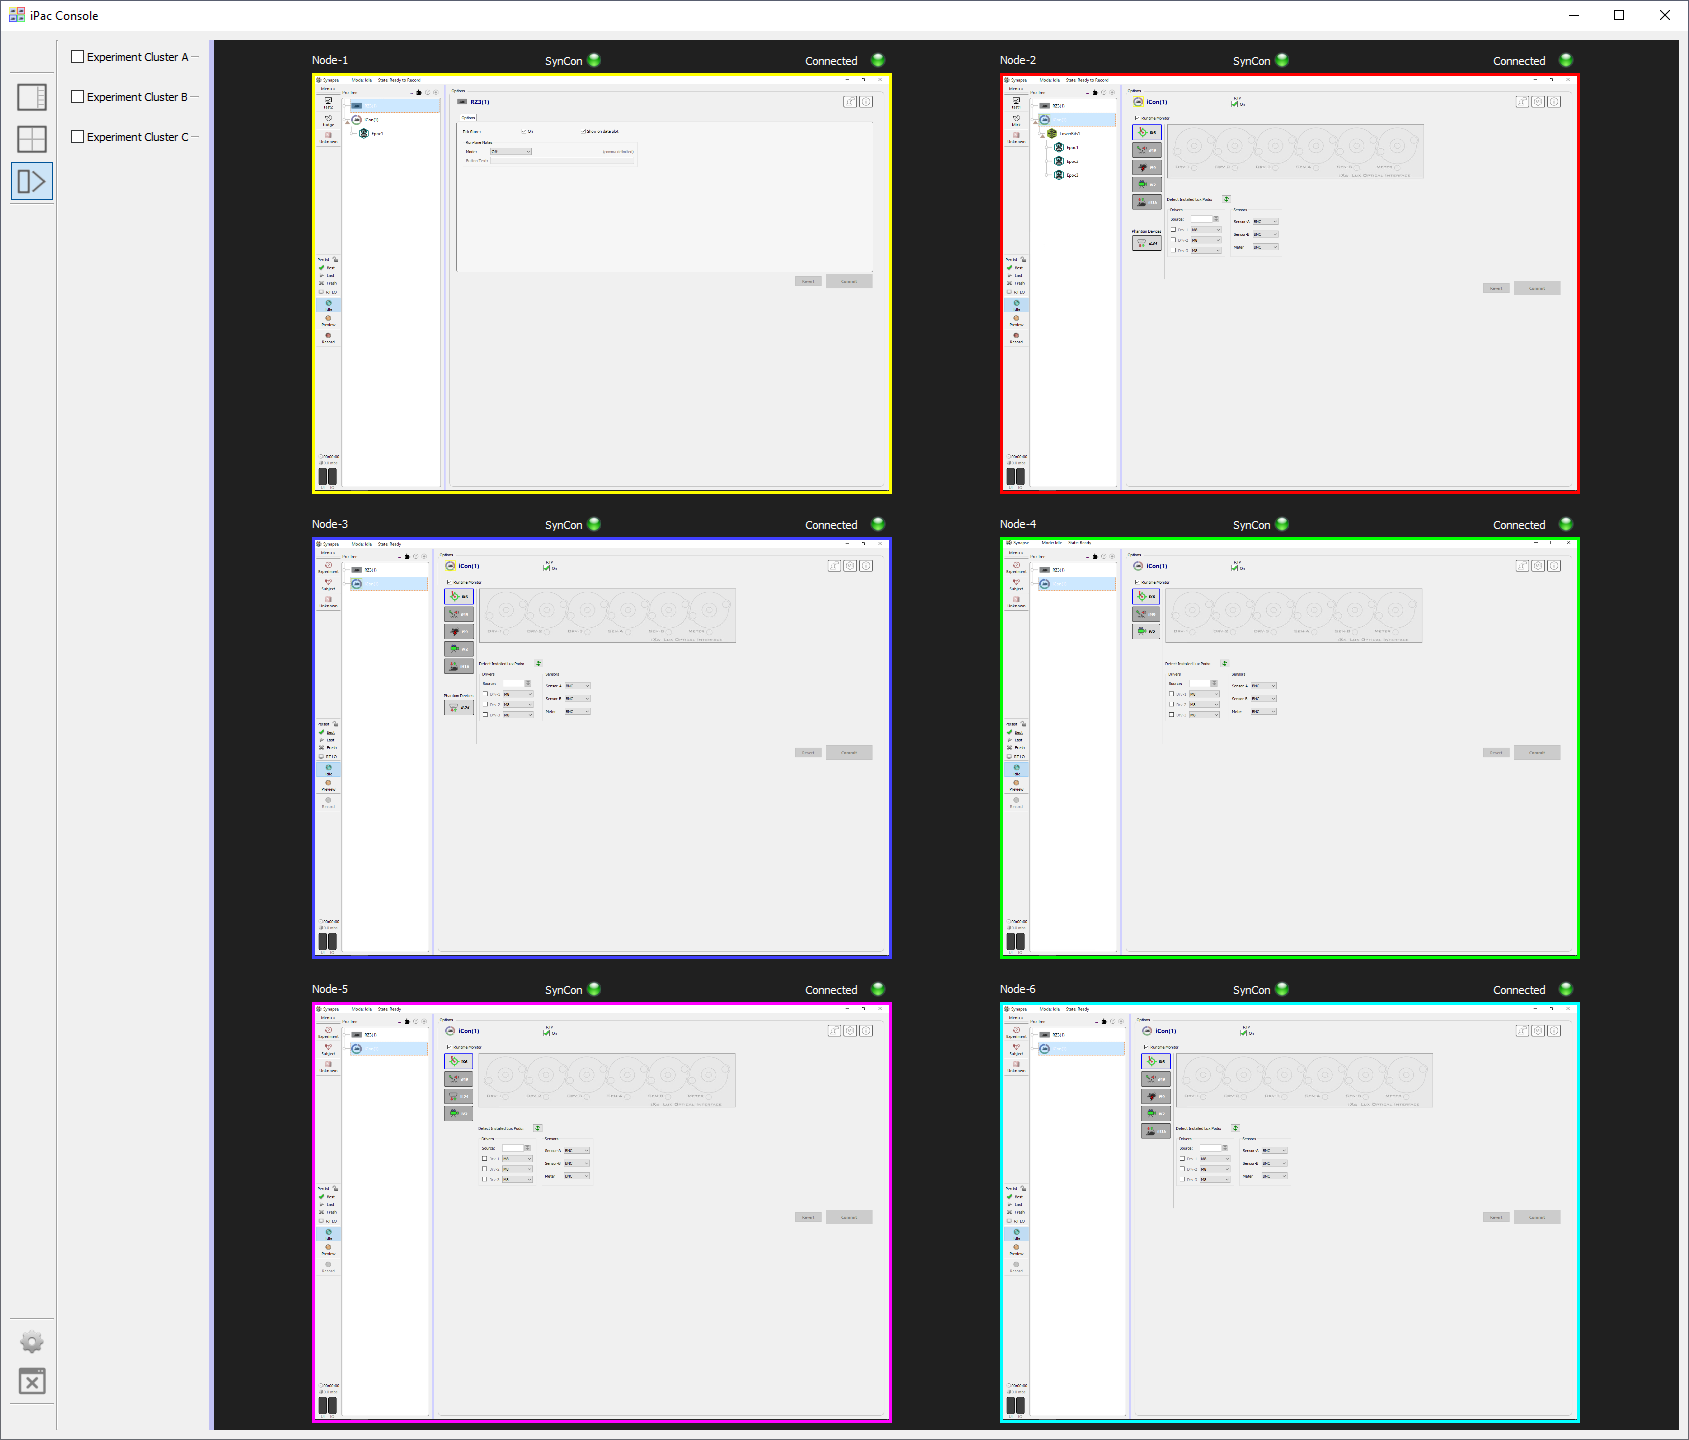 |
| iPacConsole All Focus Layout on iPac6 |
Using Experiment Clusters
Experiment clusters allow for up to three different experiments to be run at the same time across any combination of nodes and subjects.
-
Click the experiment cluster button
 on the
left toolbar of iPacConsole to open the experiment cluster panel.
on the
left toolbar of iPacConsole to open the experiment cluster panel. 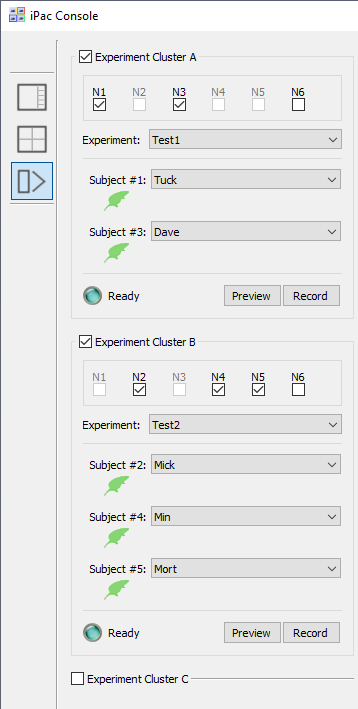
Experiment Cluster Options In iPacConsole -
Select the checkboxes based on how many different experiments you want to run simultaneously.
-
Use the checkboxes to select the nodes you want to run the experiment. Nodes can only be assigned to one cluster at a time.
-
Select the experiment and subjects using the dropdown lists. The subject numbers correspond to the node numbers that were selected. Experiments and subjects created or modified in any node will be available here once the automatic upload to the shared drive is complete. See Sharing Experiments and Subjects below.
- The rat icon next to a subject will be green when the node is ready to Preview or Record and blue while running. A grey icon indicates the subject is not available or an error has occurred.
-
Use the Preview and Record buttons will start running the selected experiment on all the selected nodes. This will automatically send the selected subjects and experiments to SynCon on the selected nodes. Separate experiment clusters can be started and stopped independently of one another.
Note
The experiments on each node are started sequentially and there may be a slight delay between the start of a recording from one node to another.
SynCon Software
SynCon is a special version of Synapse with the following key differences:
-
Runs at 6 kHz sampling rate only
-
Includes Base Synapse, Fiber Photometry, and Pynapse Coder Synapse Packages
-
The rig contains only the RZ3 and detects the attached iCon modules
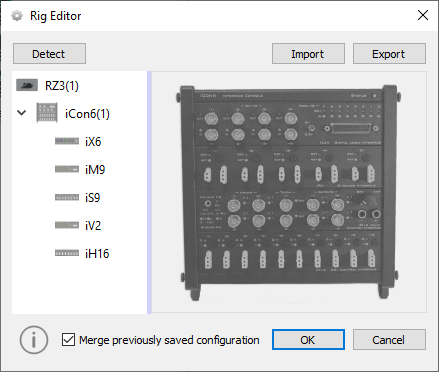
Rig Editor for a Single Node -
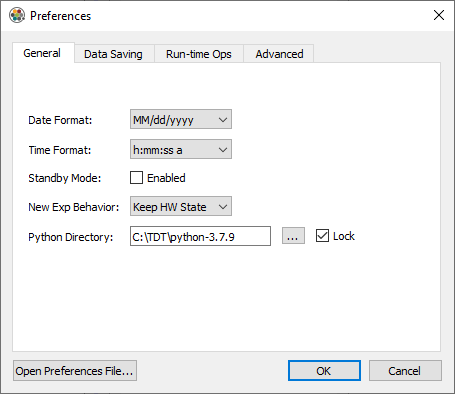
Unnecessary preferences are removed from the menu. This includes:
- User accounts
- Clustering options
- Corpus options
Accessing SynCon Gizmos
By default, the gizmo panel in SynCon is hidden to maximize screen space. It can be opened by
clicking the gizmo plus icon ![]() above
the processing tree.
above
the processing tree.
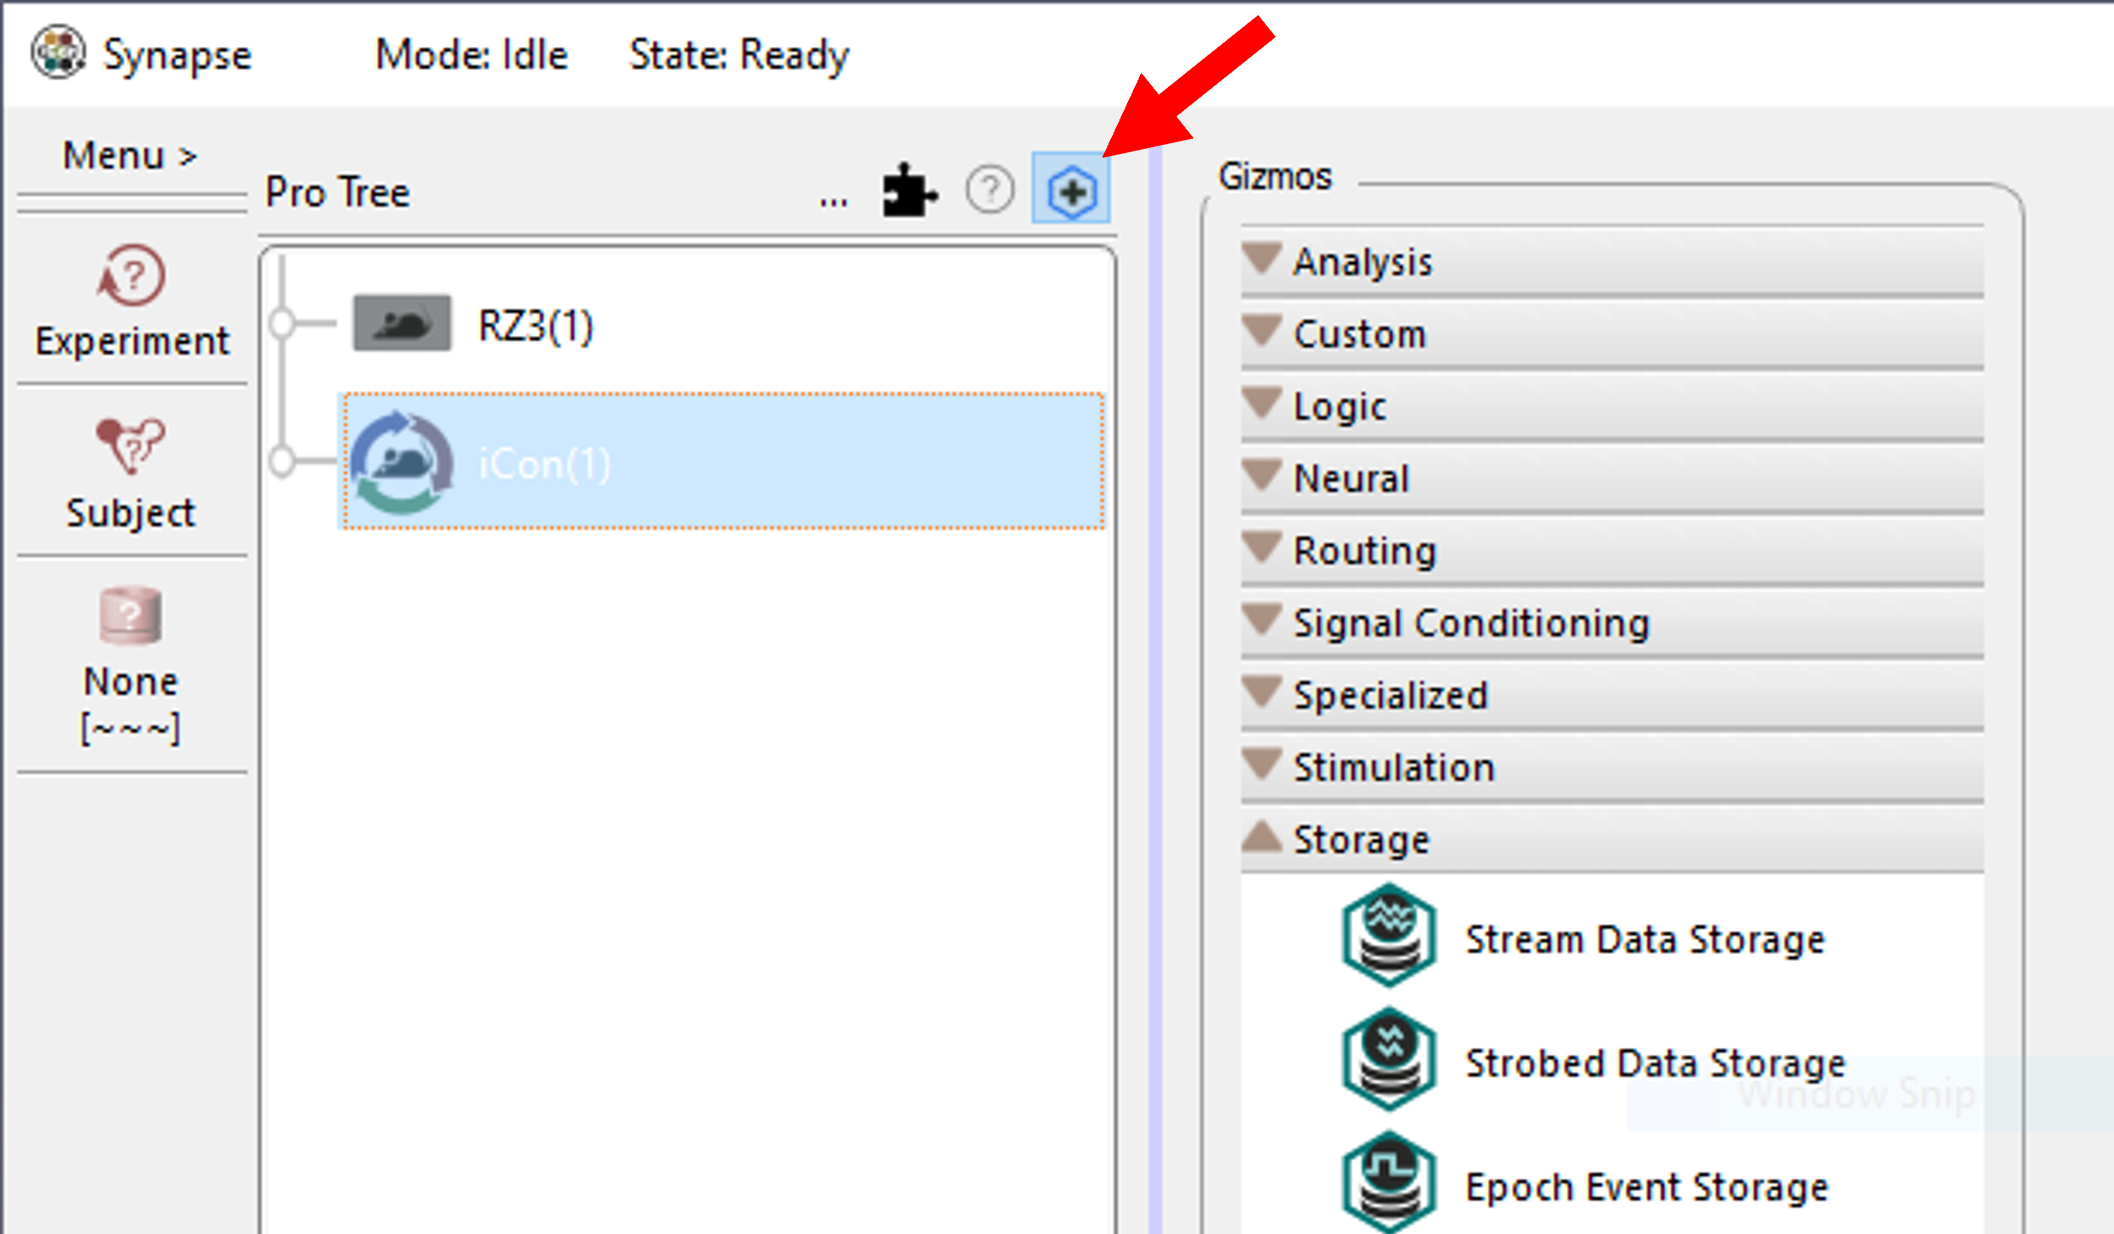 |
| Gizmo Panel Button Location |
Tank Data Location
SynCon is configured to write its tank data to the shared drive on Master. Each node writes
to this tank on the shared drive (Z:\Tanks).
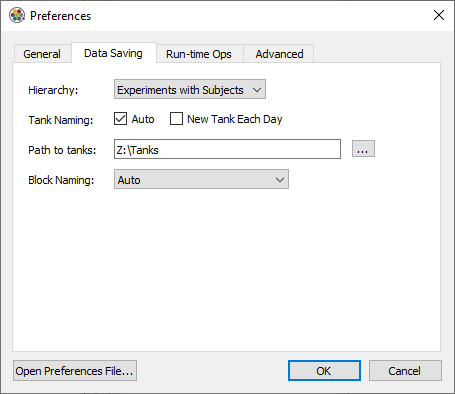 |
| Node-1 Data Saving Preferences Menu |
Temporary preview data will be written to Z:\Tanks\Syncon_Previews\Node-{n}, where {n}
is the node number. Data stored here will be removed when the Preview ends.
Sharing Experiments and Subjects
Experiments and Subjects that are not marked as "Private" are shared between the nodes. When an
experiment or subject changes on one node, it is written to the Shared folder on the master
shared drive (Z:\Shared\ from the node). Other nodes running Synapse see this and import the
updated experiment or subject into their own database.
If other nodes already have that experiment selected, it will be cleared and can be re-loaded manually or by using the experiment cluster panel.
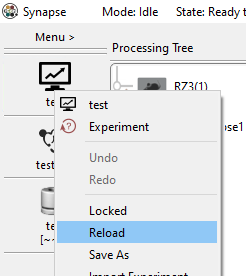 |
| Reload Experiment |
Important
For experiment and subject sharing to work, do not start your experiment name with
Experiment or the subject name with Subject.
Per-Node Experiment Configuration
Some iCon modules will require manual configuration in SynCon on each node they are attached to.
iVn
Each iVn camera requires a reference video. Instructions can be found in the iVn manual. This should be repeated for all cameras attached to a node. Video frame rate and resolution settings need to be set individually and do not sync between nodes.