BioSigRZ Software
BioSigRZ software is streamlined and optimized for ABR and DPOAE screening. The software provides a simplified interface for selecting stimuli and configuring how the response will be recorded and processed.
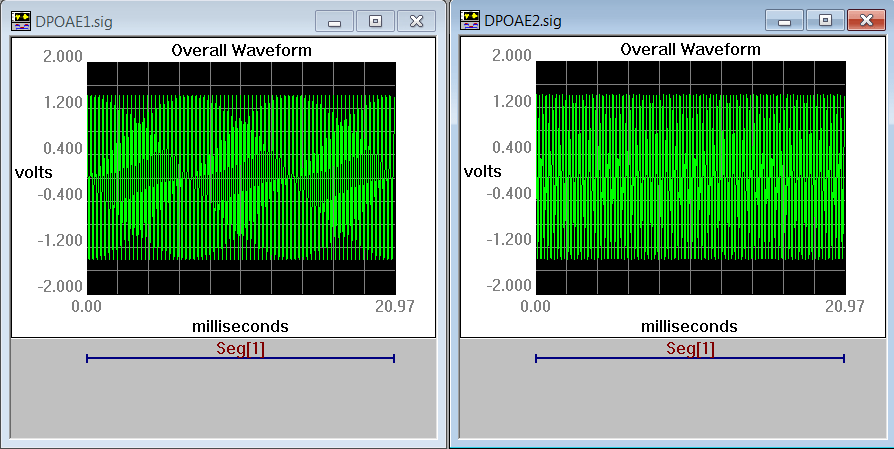
DPOAE
Two tones are typically presented at multiple frequencies to target specific areas of the subject's hearing range.
Out-of-the-Box Experiments
When the software is installed, out-of-box an experiment file for DPOAEs is stored at:
C:\TDT\BioSigRZ\Configs\DPOAE
The default values used in the pre-configured experiment are set to values suited to typical experiments. Your protocol or circumstance may differ from these values but these will work as an example or a starting point and can be modified to fit the needs of your lab.
To open the DPOAE experiment configuration:
-
Launch BioSigRZ
-
Click the menu File → Open Config. File
-
Browse to and open the following file:
C:\TDT\BioSigRZ\Configs\DPOAE\Root_DPOAE.acfTwo tones that are about 20% apart will be presented continuously. Distortion-product data will be collected every 20.971 milliseconds and averaged 512 times.
DPOAEs will be measured at the following center frequencies(Fc): 4000 Hz, 8000 Hz, 16000 Hz, and 32000 Hz.
The tone frequencies will be F1 and F2, are calculated using the center frequency where F1 is Fc * 0.909 and F2 is Fc * 1.09. This yields frequencies of primary 1, named Tone 1, and primary 2, named Tone 2, that are geometrically centered about Fc.
The Level of the two primary tones will remain equal and will vary with each frequency from 80 dB SPL to 20 dB SPL in 10 dB decrements.
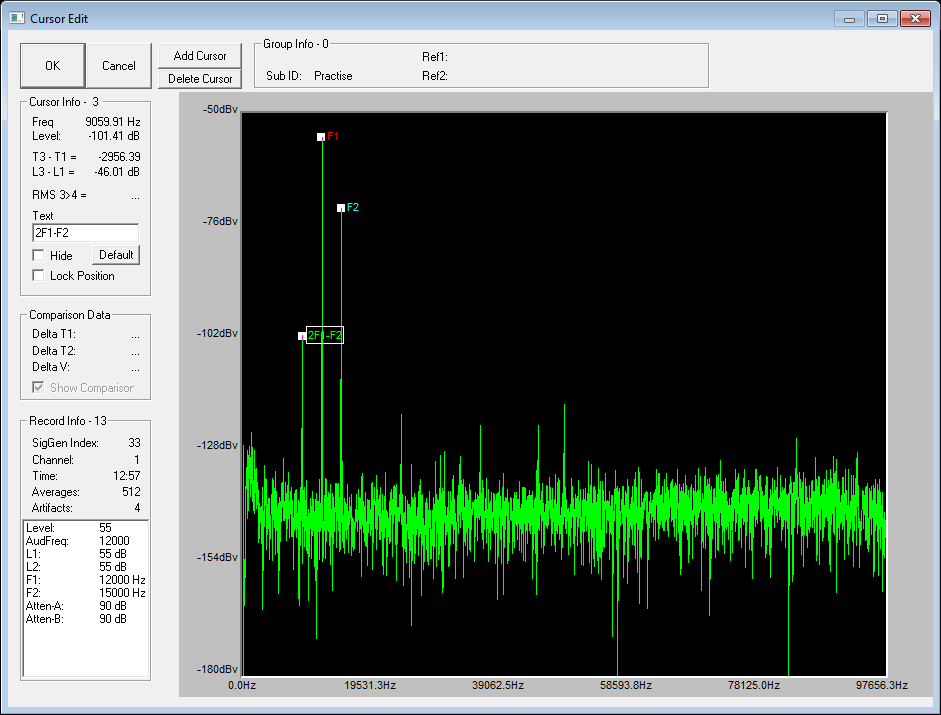
This DPOAE test is designed to measure the level of the "cubic difference tone." which is at 2F1-F2.
The Stimulus Settings
The default stimulus settings represent a typical configuration and should be fine to begin, but you may eventually want to make adjustments.
The stimulus setting dialog boxes can be opened by clicking Setup → Stimulus.
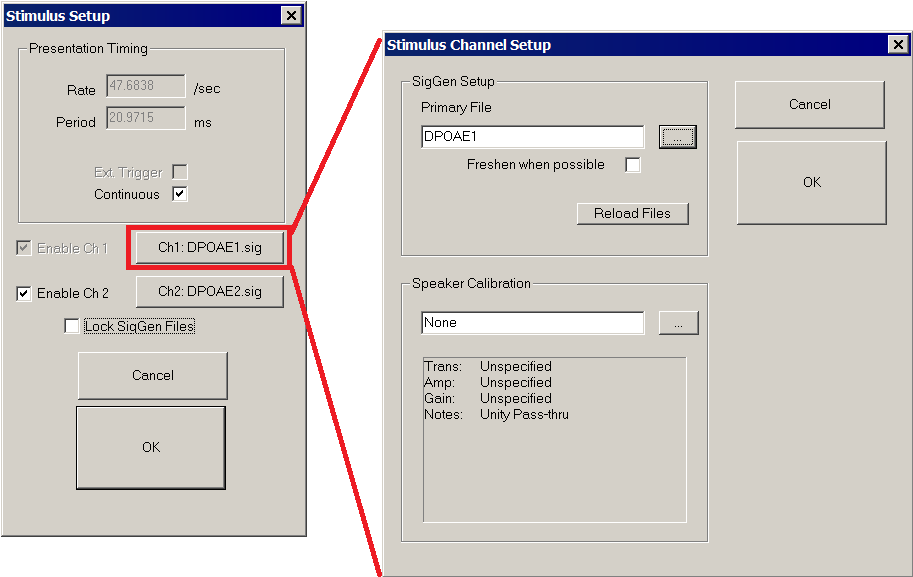
The setting notes below provide information about each setting.
The Acquisition Settings
The default acquisition settings should be fine to begin, but you may eventually want to make adjustments.
The acquisition settings dialog boxes can be opened by clicking Setup → Acquisition.
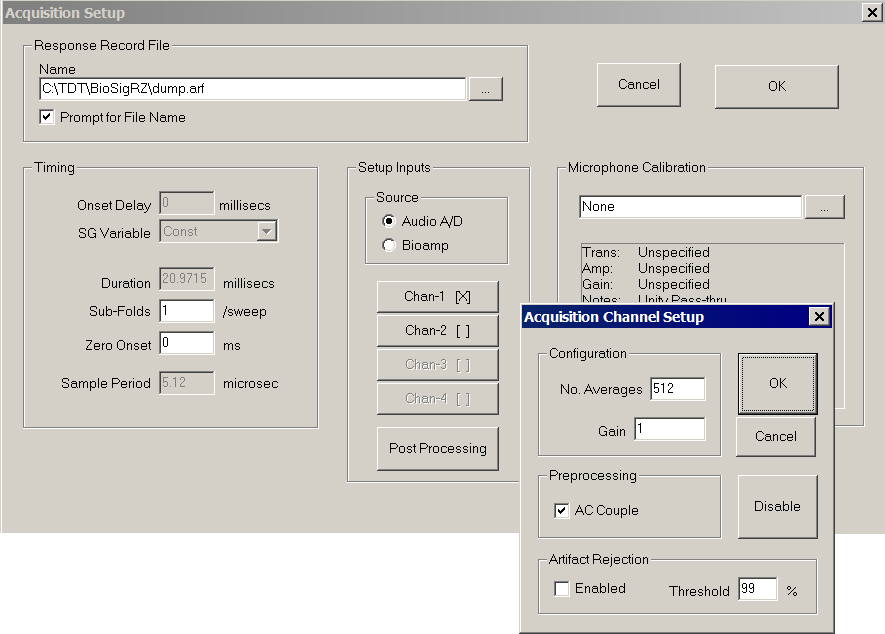
The setting notes below provide information about each setting.
Auto Cursoring
The auto-cursor feature can place up to 10 cursors on each acquired trace as a mathematical function of a variable or at a specific frequency. BioSigRZ supports automatic feature finding to minimize the amount of manual cursor manipulation that has to be performed after data acquisition. Cursors are defined from the Setup menu, Auto Cursors command. Available choices include features such as peaks, valleys, zero-crossings, absolute positioning, and more. See the BioSigRZ Manual for more information on using Auto Cursor.
This experiment has auto-cursor pre-configured to mark F1, F2, and 2F1-F2 so they can be easily viewed and extracted later for analysis. After DPOAEs are acquired, you can add or edit cursors in the Edit Cursor window. This window is opened when you double click a trace (waveform) in the History or Worksheet plot.