Tank Filtering
A variety of filter options are available in OpenSorter to include or exclude spike events based on time, epocs, or artifact rejection. These filters may be customized to work together (such as selecting all data outside a particular time interval and within a specified voltage range). This flexibility allows the end user to further manipulate the data set before or after sorting the waveforms.
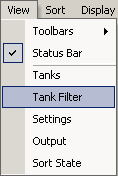
The Tank Filtering dialog is accessed either by the Tank Filtering tab located at the bottom of the Tanks panel or by selecting the Tank Filter option in the View menu.
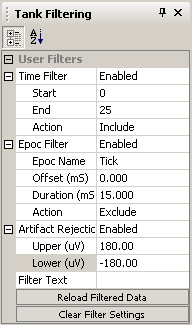
Time filter specification - When enabled, specify start and end times to include or exclude events based on the timestamp of the events.
Epoc filter specification - When enabled, designate an epoc and filter events based on the time offset of that epoc. For example, the filter shown above excludes events that are within 15 ms after the onset of the Tick epoc.
Artifact Rejection specification - When enabled, designate a voltage range (in µV) for which values outside of the range are rejected as artifacts. A value of 0 turns a particular limit off.
Filter Text specification - Enables users to quickly apply filters through text entry. The Filter text box supports standard logical operators, such as: =, <, >, and, or, and is always enabled.
Note
The Filter Text specification allows multiple filters to be combined for more versatility. For example, a filter for (Time > 5 AND Time < 20) OR (Tick < 15) OR (SORT < 3) would include events for the timestamp range 5-20 as well as the epoc Tick for values less than 15 and events with a sort code less than 3.
Applying and Clearing the Filters
When the necessary filters have been specified and enabled, click the Reload Filter Data button to apply the filtering conditions to the dataset. Data is reloaded from the tank or saved sort and filters applied.
Note
Any unsaved sorting information is discarded when data is reloaded. After the filters have been applied, the (filtered) label is displayed in the top right corner of the waveform space to indicate that the dataset is currently filtered.
When the Reload Filter Data button is pressed, the filter specifications are applied in the following order: Time Filter, Epoc Filter, and Artifact Rejection. However, filters defined using the Filter Text specification take precedence over any other filters of the same type. The duplicated filter settings are ignored. For example, if a time filter is specified in the Filter Text specification then start and end times defined under the Time Filter specification are ignored.
Clicking the Clear Filter Settings button will disable all tank filters for the currently selected channel.
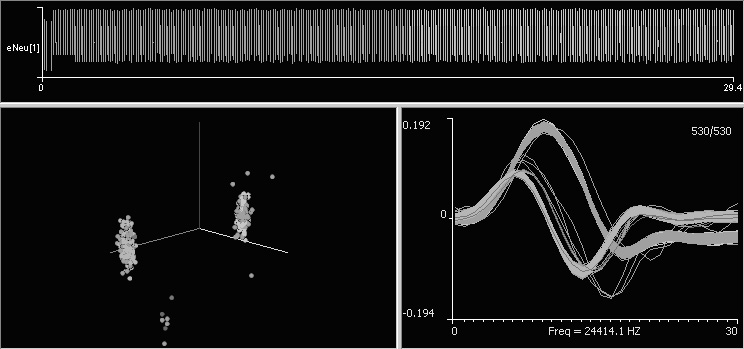
The image above shows the unfiltered data set. The image below shows the data after the filter settings above are applied. The excluded events are removed from the tabbed window display. Note that all filter characteristics have been applied including a time range of 5-22 seconds, a voltage range -180 µV to 180 µV, and 500 ms of events that occurred 2 ms after the onset of the Tick epoc. Notice that the text (filtered) now appears in the top right corner of the waveform space, indicating that Tank Filtering is active for the current channel.
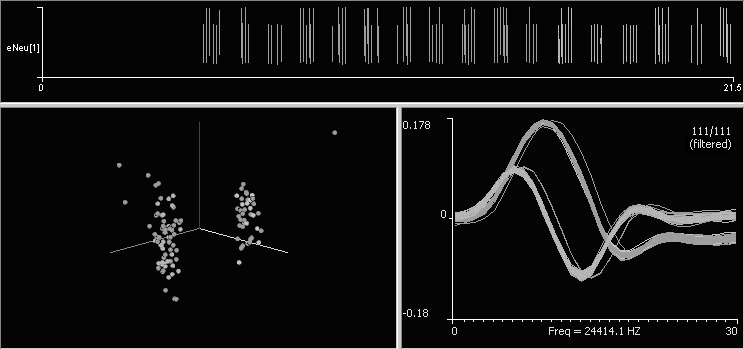
The main advantage Tank Filtering offers is a means to remove unwanted events or anomalous data from the dataset prior to calculation of the statistics. This allows end users to optimize the statistics for events that best represent the characteristics of the spikes. Once saved as a user SortID, the filtered and sorted dataset can then be exported in OpenBrowser for further processing.
Saving Filtering Characteristics
After filtering a dataset, Tank Filtering characteristics are saved when the sort results are saved to a SortID. Each channel may contain its own unique filter characteristics which are loaded whenever the channel is selected. Loaded filter characteristics can then be modified further before being saved again. If another channel is selected, the filter characteristics of that channel are loaded (if available). If there are no saved filter characteristics to load the currently configured characteristics will remain unchanged.
Applying Tank Filters to an Automatic or Semi-Automatic Batch Process
Tank filtering is an interactive tool which is configured for an individual data set. Applying tank filtering characteristics across numerous data sets simultaneously can be done through the OpenSorter Batch Processing option.
To apply a single Tank Filter to multiple data sets:
-
Configure the desired filter characteristics in the Tank Filtering panel and click the Reload Filtered Data button.
-
Click Set-up Batch Process from the Batch Processing option in the Sort menu or click the
 Batch Sort button to open the Batch Options dialog.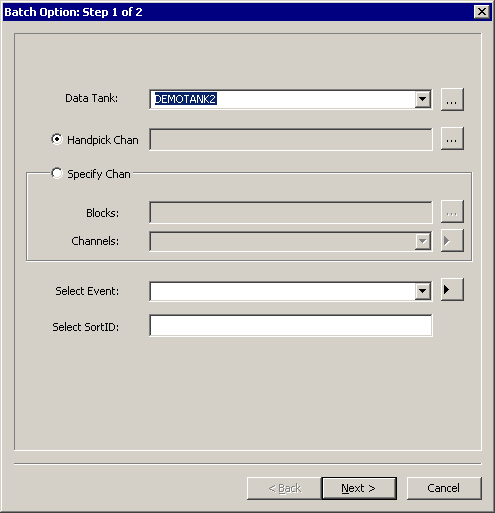
-
In the Batch Options dialog, select the data tank in the Data Tank field.
-
Next you must select the data sets of interest.
-
To specify differing channels within each block to be processed (for example, channel 2 of block 3 and channel 4 of block 5), choose the Handpick Channels option.
-
Click the ellipsis (...) next to the Handpick Channels option.
-
In the Pick Data Set dialog, expand the desired blocks by double-clicking the desired blocks and select desired channels using standard Windows keyboard methods (click, Shift + click to select contiguous blocks or Ctrl + click to select non-contiguous blocks).
-
Click Done.
-
-
To specify a fixed group of channels to be processed all within a selected block (for example, channel 2 of blocks 3, 4, and 5), choose the Specify Channels option.
-
Click the Specify Channels option.
-
Click the ellipsis (...) next to the Blocks field. In the Pick Data Set dialog, select the desired blocks using standard Windows keyboard methods.
-
Click Done.
-
In the Channels box, type the desired channel numbers separated by a comma or semicolon or by a dash to select a range. Leaving this field blank will assume all channels are intended to be used.
-
-
To process all channels in all blocks selected, choose either option and select only at the block level. Do not pick or specify any channels.
-
-
In the Select Event box, leave the field blank to include all spike events or type the four character event code to select a specific event.
Note
The Select SortID box is currently not supported.
-
Click Next.
-
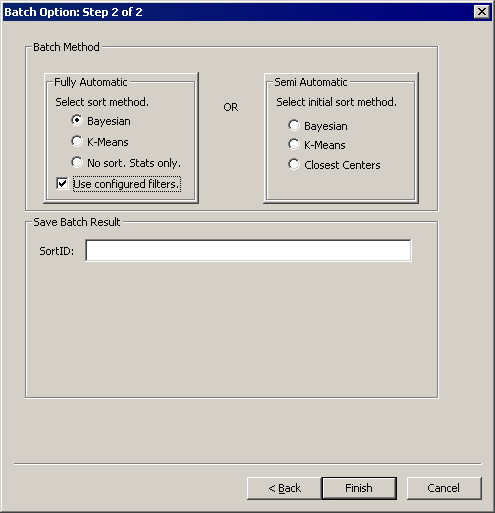
Select the desired Batch Method. For more information on automated batch methods see Processing Multiple Data Sets.
-
Click the Use currently configured filters checkbox to apply the currently configured Tank Filter characteristics to the selected data sets.
-
Enter a name for the SortID to be created after the batch process completes.
-
Click Finish.