Epoch Annotation
Epoch Annotation allows user to add notes to a block of data. An epoch store is
selected for data marking and storage and an index integer is associated with each
note text string. When a note is placed in the data, the corresponding integer value
is associated with the timestamp for the corresponding epoch event and is stored with
the epoch data in the tank. The list of notes and the text string for each are
automatically saved into a *.tnt file in the block directory.
Setup
Entering Annotation Mode
The annotation tools are part of OpenScope's Flow Plot— the only plot type that supports annotation. The Flow Plot must be added to the workspace and data must be loaded to the plot before the annotation tools are available.
To generate the Flow Plot:
-
Drag a Block from the Block list to the grid.
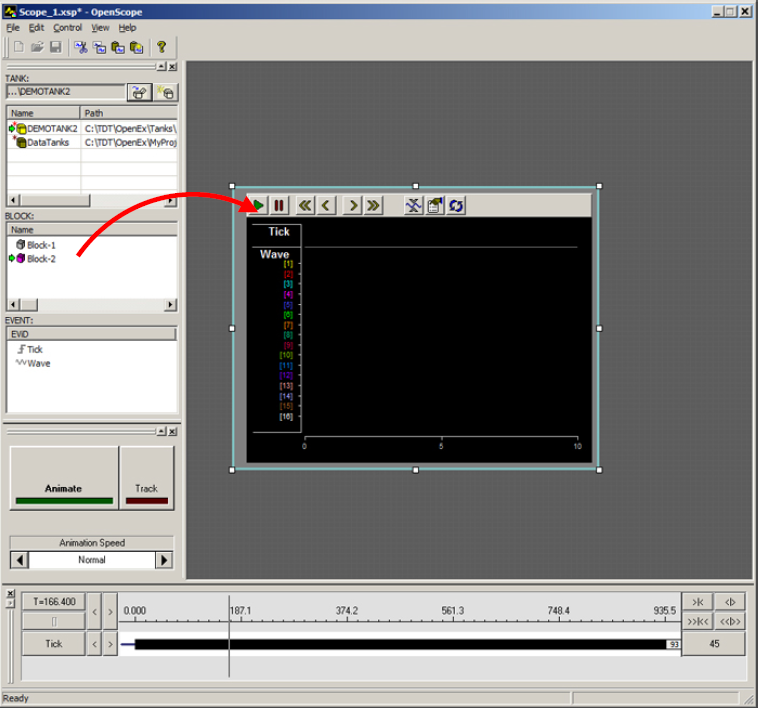
Data may be viewed through animation, clicking the timeline to a specific location, or using the left/right arrow keys to move the timeline one full timespan.
To enter annotation mode:
-
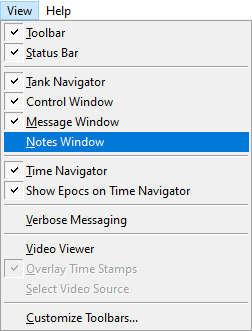
Click the View menu and click Notes Window.
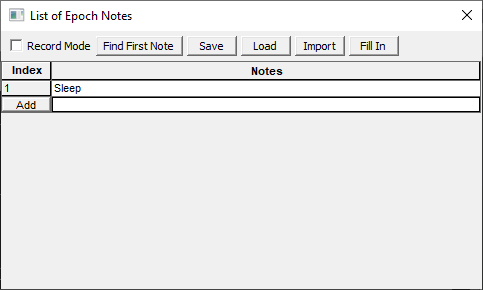
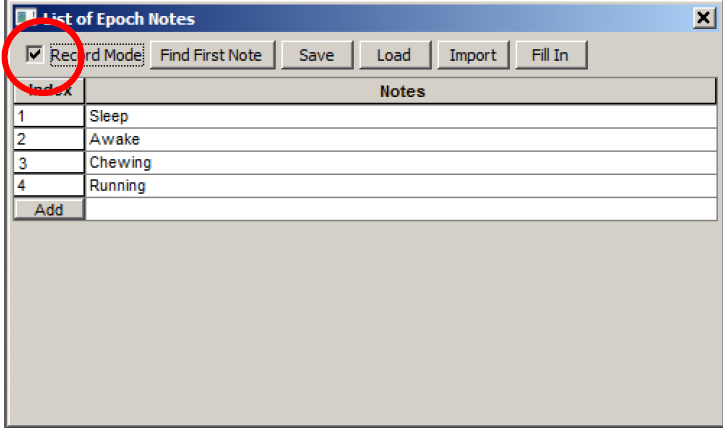
The List of Epoch Notes window opens.
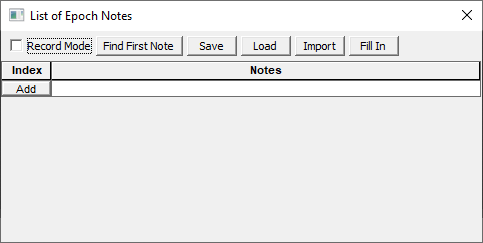
The List of Epoch Notes window is a floating window and can be moved as needed. It must remain open while working with the animation tools.
Loading Epoc Data
When the Notes Window is open and data has been loaded to the plot, a shortcut menu (right-click) is available in the data area of an epoch store in the plot.
To load data to the plot:
-
Click the Animate button then click the button again to stop animation.
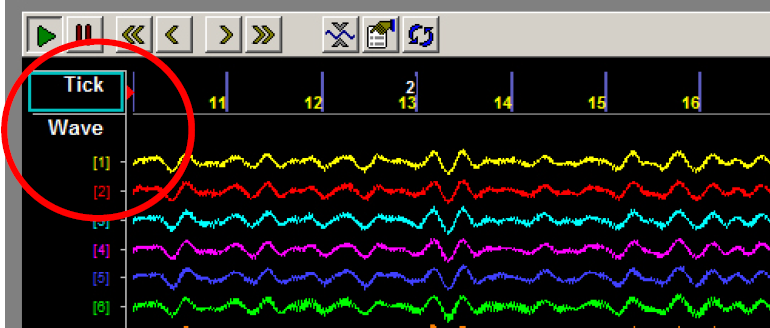
If there is only one epoch store in the dataset, a red arrow appears next to the epoch's name in the plot.
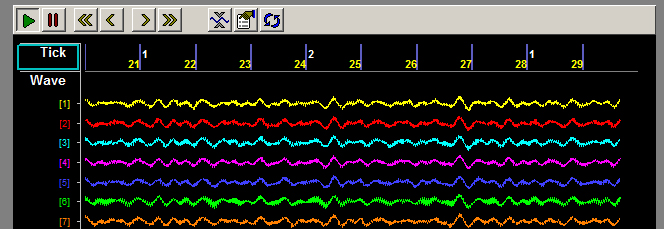
The Tick epoch, a simple timing marker that fires every second, is present in most
datasets and is a convenient epoch for annotation, so it is used in this example.
Camera frame epoc events (e.g. Cam1 or Vid0) are also commonly used.
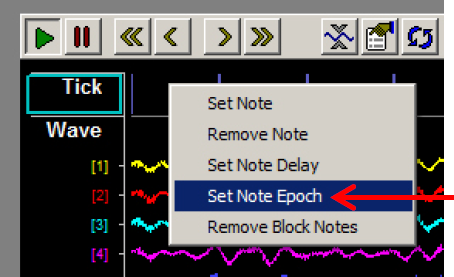
If there is more than one epoch in the dataset, specify the note epoch:
-
Right-click the data area of the plot for the desired epoch.
-
Click Set Note Epoch on the shortcut menu.
A red arrow appears next to the epoch's name in the plot.
Viewing Data to be Annotated
Users can preview or view the data to be annotated either by using OpenScope tools to animate the data or by stepping through the data one timespan (visible screen) at a time.
To step through the data:
- Press the right arrow key or left arrow key on the keyboard to jump forward or backwards in the data one full timespan.
This technique works in both manual or animated mode.
Creating a Note
New notes strings can be added in the List of Epoch Notes window or directly on the Flow Plot as a note is set.
Note
The Note Epoch must be specified before creating notes, see Loading Epoc Data above.
If you know what notes will be used, then create the note list before you start annotating.
To create a new note without setting a note in the data:
-
In the List of Epoch Notes window, click the Add button or double-click the blank note field to open the dialog.
-
In the Note field, type a text string.
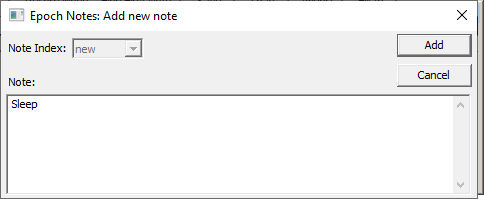
The note string can be multi-line. After the note is added, the line breaks are represented with a pipe '|' character in the Notes description and in the corresponding text file.
-
Click the Add button.
An Index integer is associated with the new note string and it is added to the
list of epoch notes. The text string is automatically appended to a *.tnt text
file in the block directory.
To create a new note while setting the note in the data:
Note
Data must be loaded to the plot before the annotation shortcut menu is available.
-
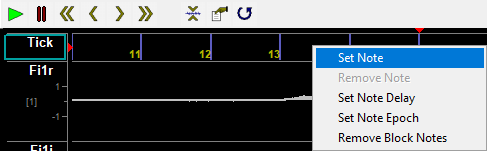
Right-click to the right of the desired location in the epoch data and click Set Note on the shortcut menu. Note: The annotation algorithm locates the most recent event (looking backward in time) and associates the note with it.
-
In the Note field, type a text string.
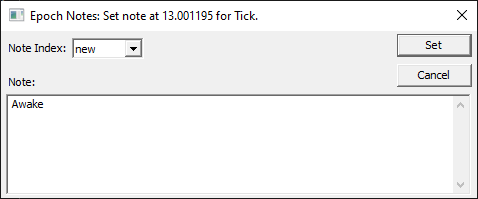
-
Click the Set button.

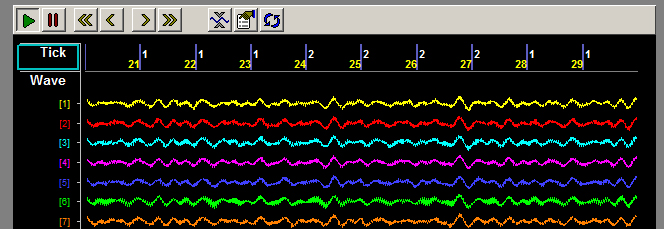
An Index integer is associated with the new note and set in the data at the time/position of the most recent instance of the Epoch event. The integer is displayed a white numeral above the data on the right side of the time bar and its value is stored with the epoch data in the tank.
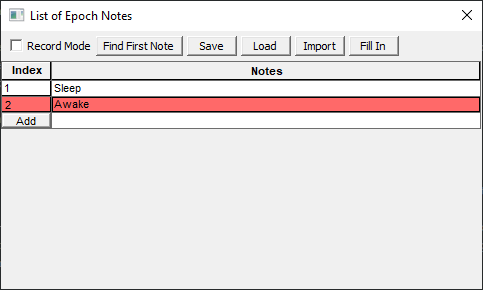
The newly added note is highlighted in red in the List of Epoch Notes window and the text string for the new note it is appended to a
*.tnttext file in the block directory.Users can continue to add notes in the List of Epoch Notes window until all the desired notes have been added and/or add notes on-the-fly using the annotation shortcut menu.
To set an existing Note Index in the data.
-
Right-click to the right of the desired location in the epoch data and click Set Note on the shortcut menu.
-
Select an integer from the Note Index drop-down menu.
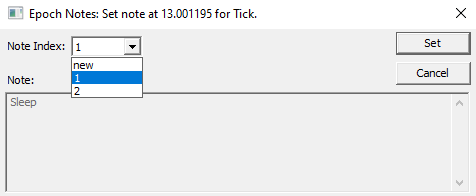
-
Click the Set button.
-
Users can step through the data using the right and left arrow keys, to continue annotating, or use OpenScope animation.
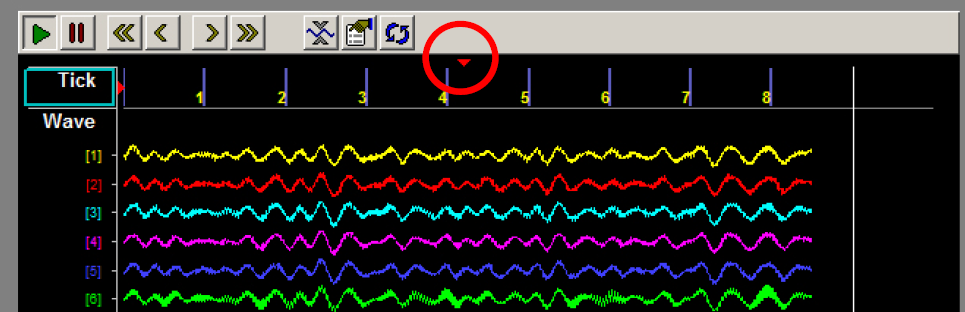
Rapid Annotation With Keypad
Users can quickly annotate data by pressing number keys (1-9) either while the plot is animating or while frozen. The arrow keys can be used to move back and forth on the timeline in both modes.
You can set a time delay so that notes will be set at some time before the position of the white vertical time bar when the key was pressed. This accounts for user delay while pressing the number keys during playback review.
The red arrow at the top of the plot indicates the timestamp relative to the solid white bar where a new note will be recorded when the keypad number is pressed.
Warning
New notes added will overwrite any note already set at the same event timestamp.
To set a note delay:
- Right-click the data at the timestamp where you want the top red arrow to display and choose Set Note Delay to move the arrow to that location. Once the delay is set, it will be used for all notes set during animation.
To annotate:
Before annotating data, ensure that the List of Epoch Notes window is open, the Note Epoch has been set, and the necessary notes have been created.
-
In the List of Epoch Notes window, select the Record Mode box at the top left of the window.
-
Click the Animate button in the OpenScope controls to animate the data, or press the arrow keys to move to the desired location.
-
Press the number key corresponding to the integer Note Index for the desired note.
-
The note is added, indicated by a white number in the display and that note is highlighted red in the notes list.
-
Continue adding notes until annotation is complete.
When in animation mode, users can use OpenScope controls to speed-up or stop animation.
Important
It is recommended that users do not use the Flow Plots 'Play' and 'Pause' buttons during annotation. The Pause button freezes the plot, but animation continues in the background. Pressing the Play button re-starts the plot at the current point according to the animation, not where the plot was frozen. If more than one time span of data has passed, this can lead to overlooking some sections of the data.
Reviewing and/or Revising Annotated Data
Users can review and revise epoc note placements as needed. There are a few extra tools that can help in this process.
To locate existing notes:
- The note list temporarily highlights a note blue when that note is passed in the Flow Plot. This is true when stepping through the data or animating data. It can speed up a search for existing notes or be useful in avoiding overwriting existing notes during animation.
To remove a single note:
- Right-click the desired note marker in the plot and click Remove Note on the shortcut menu.
To remove all notes in the block:
- Right-click the data area for the Note Epoch and click Remove Block Notes on the shortcut menu.
To quickly set the note epoch for a previously annotated block:
- Click the Find First Note button in the List of Epoch Notes window. OpenScope searches the current block for the first note, and then performs 'Set Note Epoch' on that epoch event. This is useful for reviewing previously annotated data when the epoch used for scoring is not known.
To save a list of all note indices in the block, along with their time stamp, to a text file:
- Click the Save button in the List of Epoch Notes window. The data is saved to a text
file (
*.nxt) that can be loaded back into the block later, if necessary.
To load a previously saved (*.nxt) list of notes into the block:
-
Click the Load button in the List of Epoch Notes window. The Load saved notes window opens.
-
Browse to and load an existing .nxt file.
Warning
This overwrites the current note data for the block.
To import an existing Notes list:
- Click the Import button in the List of Epoch Notes window. Browse to and load an
existing
*.tntfile from another block. The list of note strings are imported into the current block list. This makes it easier to have a consistent note list across multiple blocks.
Filling in Notes
Notes mark a single event or a change in state at a particular time. When users want every event to be marked with the current state (such as asleep or awake) the 'Fill In' option can greatly speed up annotation. It allows users to add notes when the state changes, then go back and fill in every subsequent event, until the next state change, with that note index. This is useful when the user wants all epoch events from the time of the note until the next change to be returned when later reading the data into MATLAB or Python.
To fill in (add notes to all events in the store):
-
Begin with a block of data that has the state changes annotated. It is a good idea to back-up the notes data at this point, in case you need to revert to this point later. Click the Save button in the List of Epochs Notes window to save the notes.
-
Click the Fill In button in the List of Epochs Notes window.
A note is added to any epoch event that does not already have a note associated with it. For each event, the previous (or most recent) note index is used.